While many people think that once irises have bloomed all that is left to do is remove the dead heads this is not the case if you want healthy plants that will last.
For the best care of irises after flowering there are some important processes that you should follow.
We’ll take a look at why and how to care for your irises after flowering including explaining what deadheading actually does for your plant.
The reason for removing flower stems will also be explained.
We’ll also go through the process of dividing irises, as well as growing them from seeds and how to care for them.
We’ll discuss the diseases and pests that affect these flowers as well as showing you how to encourage your irises to bloom when they are failing to do so.
Why Care For Irises After Flowering?
Once the magnificent showing of iris blooms has died back what else is there for you to do with these flowers? What purpose is there in tending to them once the flowers have gone?
Well, there are a number of reasons for caring for irises after they have finished blooming.
The first reason is that the right care will help to maintain the stiff upright leaves and keep them tidy throughout the remainder of the summer months.
Secondly, paying attention to the flowers at this time of the year will stand them in good stead for the following spring. Hopefully with an excellent showing of flowers again.
Finally, and not at all the least important consideration is keeping the plant healthy and free from diseases and pests.
How To Care For Irises After Flowering
So what should you be doing with your irises once they have finished blooming?
The flower will have dried up, but it will still be attached to the stalk of the plant which remains green for a while after the flower has withered.
The dried flower heads should be removed from the stalk. This doesn’t need to be done with any kind of tool and can simply be pinched off using your thumb and forefinger.
Snap it downwards and the dead head should come off cleanly.
Of course, you can use a pair of pruning shears to deadhead your irises if you prefer to do that. By removing the withered blooms you are enhancing the whole appearance of the iris.
What Does Deadheading Do?
You may wonder what the point of deadheading your irises is. After all, won’t the withered blooms fall off on their own eventually without any input from you?
Well, no they won’t. What they will do is begin to form seed pods.
Producing Seed Pods
In the wild this is how flowers propagate, by turning dried flower heads into seed pods which then disperse and create new plants.
But in your garden you don’t want the irises to form seed pods as this draws too much energy away from the plant.
If your iris is using its energy to produce seeds it will be drawing that energy away from the production of more flowers.
This is why taking the dead flower heads off the plant will actually encourage more blooms which it may otherwise not produce.
So when you do deadhead the flowers make sure that you are not just removing the withered petals but also the green swollen sheath underneath them.
This is where the potential seed head will form, so it needs to be removed to stop this process from occurring.
You may be surprised with another flush of blooms after you have dead headed your irises as the energy is diverted back into creating more flowers.
Aesthetics
Brown withered flowers detract from other blooms on surrounding plants, so it is more aesthetically pleasing to remove them.
Try to avoid cutting any flower heads that have not yet opened. By checking the irises a couple of times a week during flowering you can keep on top of deadheading.
Some varieties of iris have blooms that only last a day, so this regular maintenance is important.
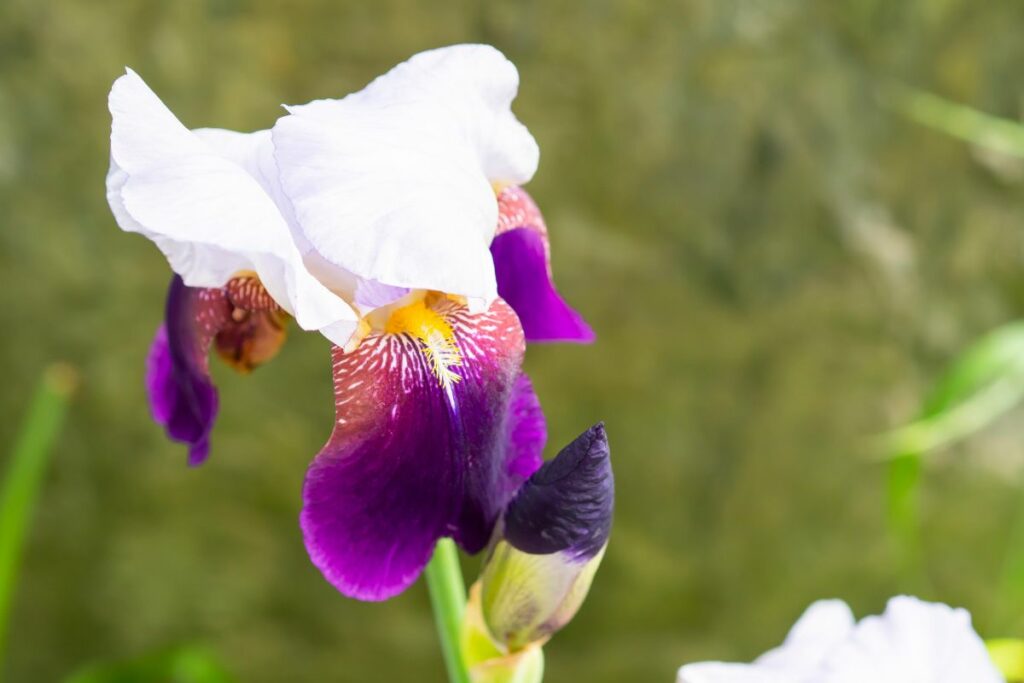
Other varieties like the common bearded iris will flower twice during the growing season. Once in the early summer and again later in the summer.
Some irises such as the unfortunately named Stinking Iris produce attractive seeds after flowering, so you may not want to deadhead this particular variety.
Removing Flower Stems
When you are confident that the iris is not going to bloom again you should remove the flower stems from the plant.
To remove the flower stems use a sharp pair of garden shears and snip the stem off at the base of the plant.
This should be about an inch above the rhizome and can be disguised by the fan of leaves still on the plant. The flower stems can be put into the compost.
The foliage of the iris should be left on the plant after flowering has stopped. This helps the iris to draw energy into the roots which will help it to survive over the winter months.
Any foliage will wither away on its own once it has served its purpose. Brown leaves can be trimmed away as and when they dry out.
In the fall, once it has withered away the foliage can be cut back to about six inches off the ground.
What Does Dividing Irises Mean?
Every four or five years you can dig up clumps of iris and divide them. This helps to cull out diseased roots and iris borer damage.
As the rhizomes age they can get crowded and become entangled, this means that they won’t bloom well. By dividing them you will keep iris plants vigorous and allow you to propagate new plants.
The best time of year to divide irises is after they have bloomed and when the weather is not too hot. Late summer is a good time to tackle this job.
Dig up the iris rhizomes with a shovel, shaking off any loose soil. If there are any flower stalks still in place these can be removed.
Now carefully pull the cluster of rhizomes apart. In some instances you will have to cut them into sections.
Each section should have a fan of foliage which you can trim to between 3 and 6 inches, cutting it at an angle.
You should examine the root sections carefully and if there are any rotten or soft parts these should be cut away with pruners.
It may be necessary to cut the roots back beyond any borer tunnels. Remember to disinfect the pruners regularly to prevent spreading disease.
Planting Divided Irises
Take each root section and replant, with just enough soil to cover the rhizome.
The new plants should be at least 12 inches apart. Water them in well and then weekly until the cold weather sets in.
New foliage should appear in the following late summer or fall and a new plant should begin vigorous growth the next spring.
Planting time is the best time to feed irises, although they are not heavy feeders, needing just some well rotted compost in well drained soil.
When you do plant your divided irises make sure that they are positioned where they will receive full sun.
The rhizomes should be planted at soil level with the long roots deep in the ground. However the surface of the rhizome should be exposed to at least some sun.
Mulching over the top of iris rhizomes is not recommended as it will prevent them getting sunlight which allows them to bloom. Covering the rhizomes in mulch will also encourage rot.
Types Of Irises
There are 280 species of irises in the world with the majority of them being native to Europe and Asia.
However, there are also 28 native species in the United States, and they are found in every state. Most are found in Pacific coastal areas and the southeastern states.
The large, colorful flowers produced by the iris are the result of a great deal of energy by the plant to attract bees and other pollinators at a time of year when competition is fierce.
Irises can achieve this level of energy as both leaf surfaces of the iris can absorb light to create energy through photosynthesis. This creates food for the plant that is stored in its roots.
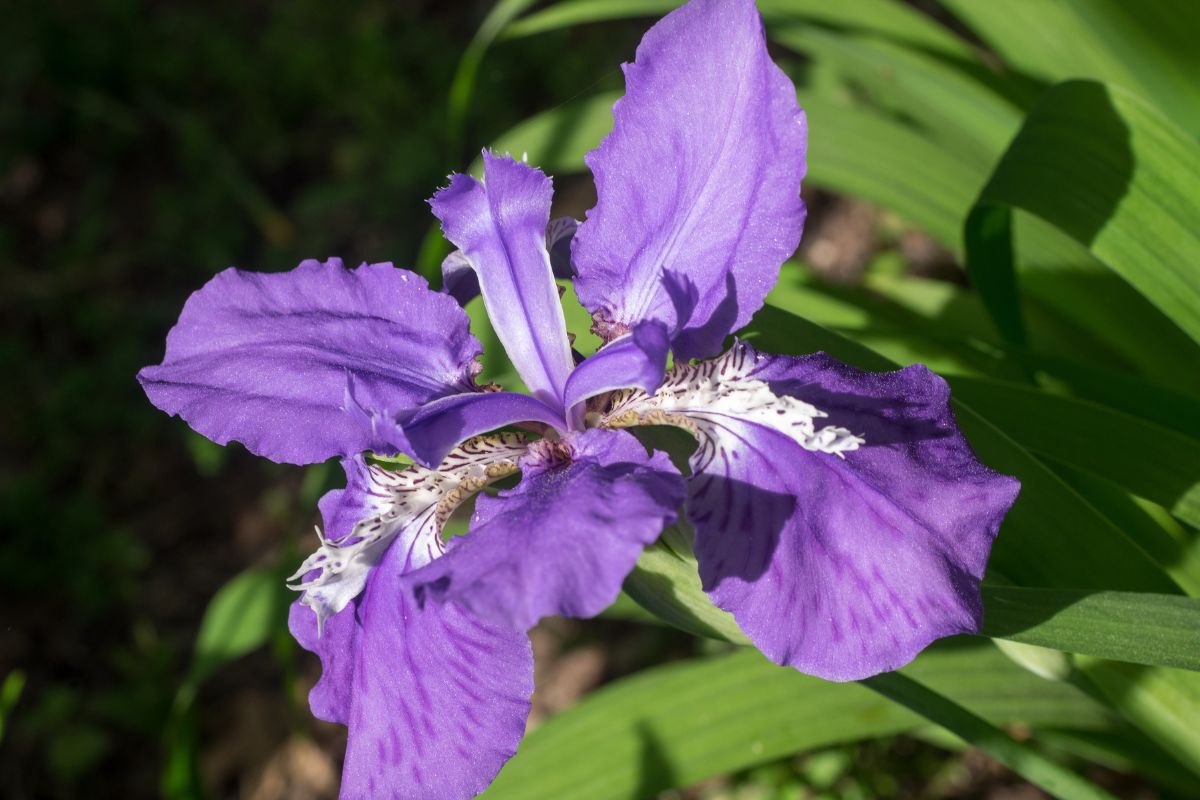
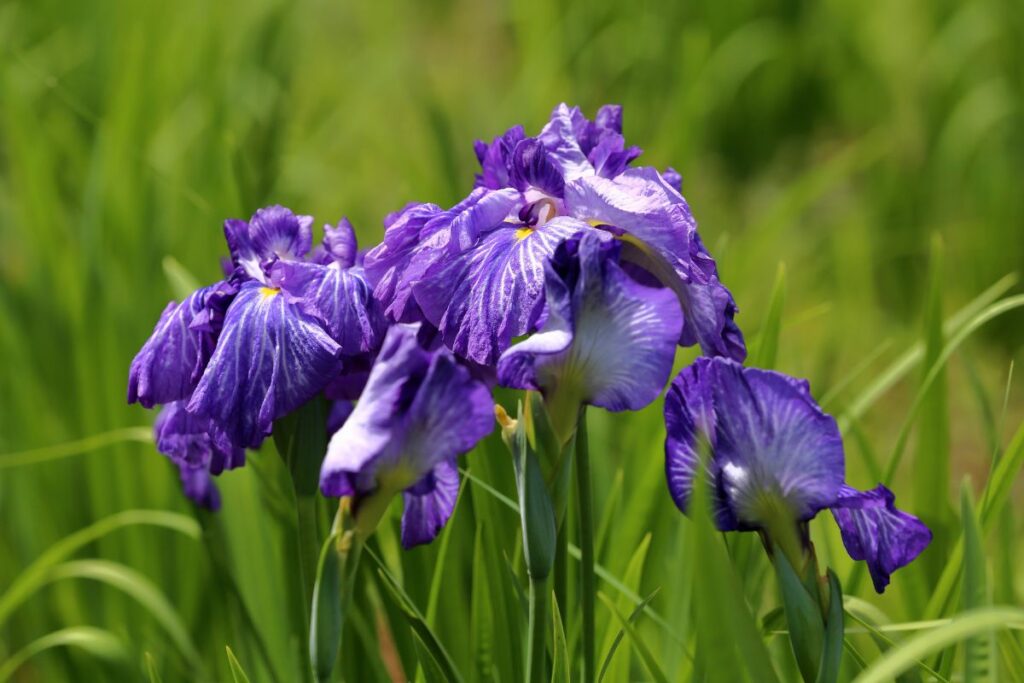
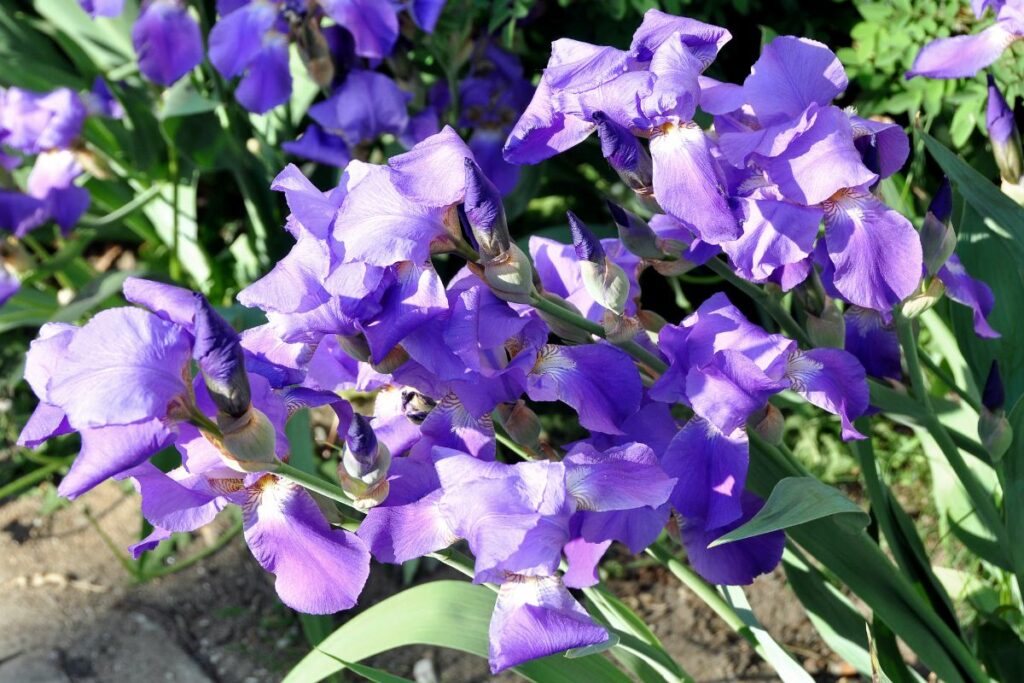
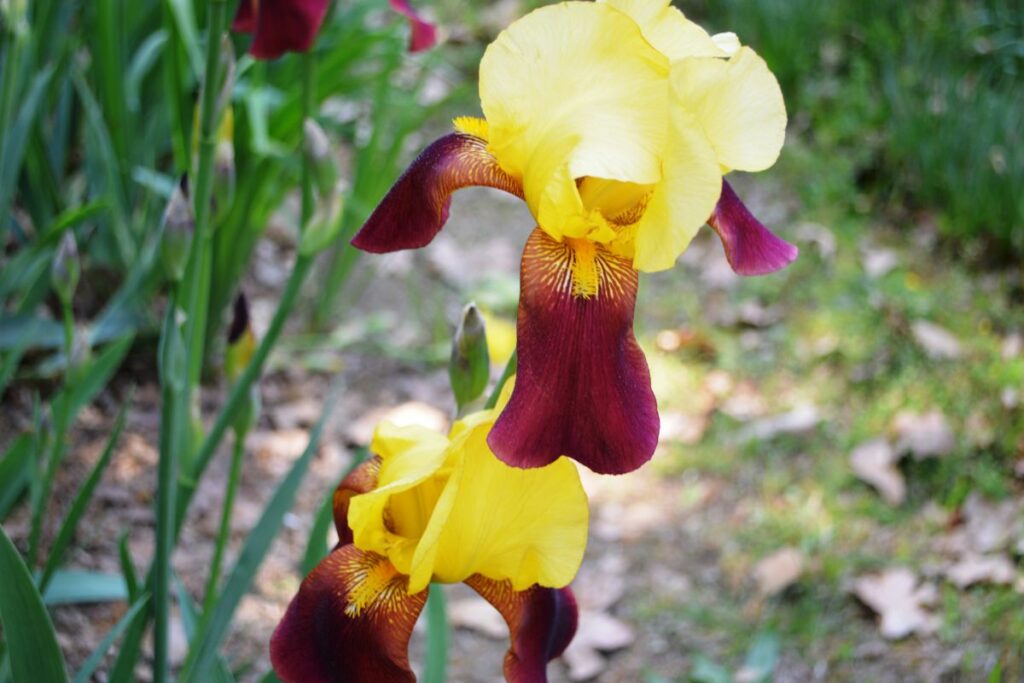
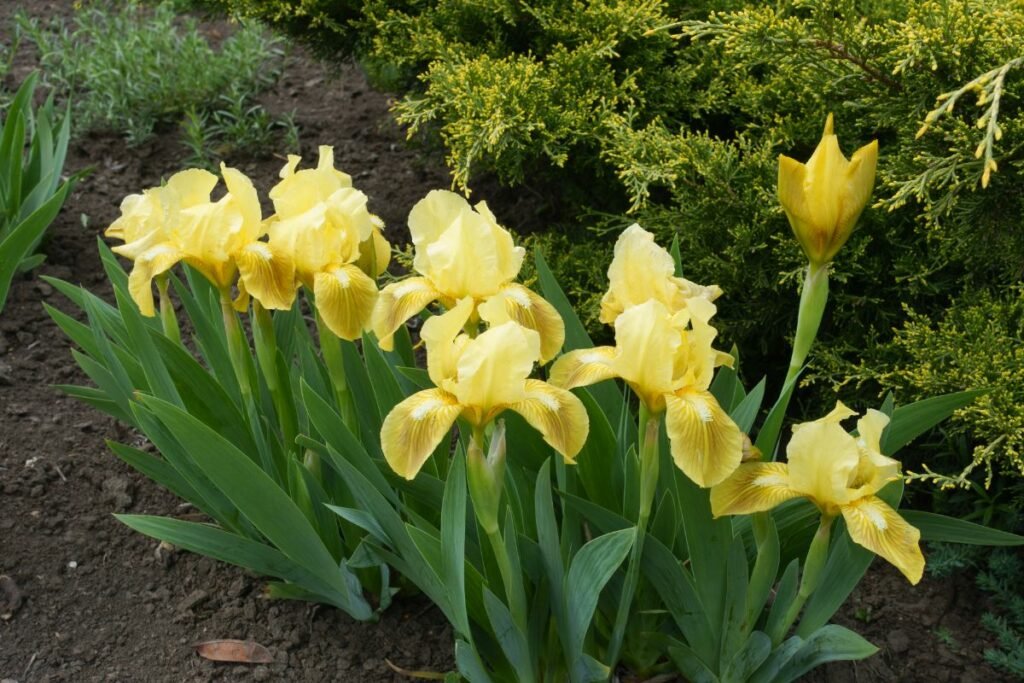
Iris flowers come in many colors such as purple, yellow, blue or pink and may even be bicolored or striped.
They are one of the few flowers that have almost true black flowers with the Before The Storm variety being such a deep shade of purple that it looks black.
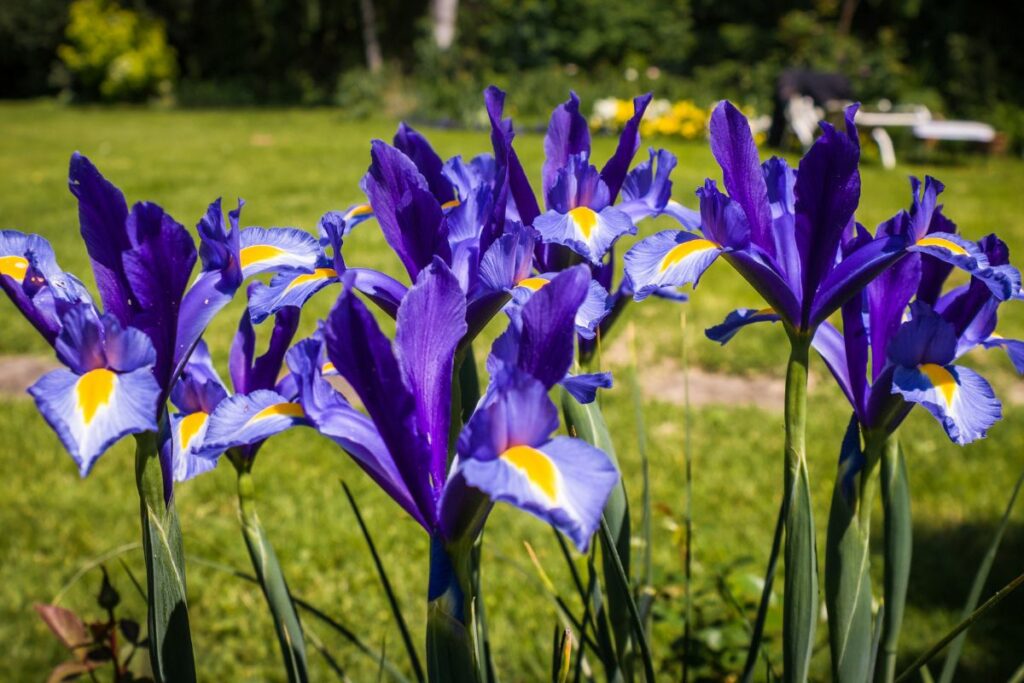
With dwarf varieties that grow to only six inches tall or others that reach more than four feet in height there is a whole range of irises to enjoy in your garden.
Some thrive in wet almost aquatic environments while others require well drained soil in full sun.
Pests & Diseases In Irises
Irises can suffer from a variety of diseases and pests, many of which show obvious symptoms that are hard to miss.
Treatment and management will vary depending on the type and severity of the problem.
Bacterial Leaf Blight
The symptoms of bacterial leaf blight are faint water soaked spots on the leaves.
These tend to enlarge when the weather is wet but remain static when the weather is dry. Managing this blight involves removing the infected leaves and abstaining from overhead irrigation.
Botrytis Rhizome Rot
You won’t be left in any doubt about this disease affecting your irises as there are numerous symptoms.
First you will notice that only a few leaves emerge in the spring and the ones that do are yellow. These then turn brown and will eventually die off.
Another undeniable symptom is the mass of gray fungal spores that form on the leaves of the plant.
Additionally the rhizomes will be suffering from a dry, mealy rot. Large, shiny black sclerotia or granule like structures can also form on the surface of the infected rhizomes.
There is nothing you can do about this disease, and you will need to destroy the infected plants. Do not put them on your compost as this will just transmit the rot to other plants.
Crown Rot
Crown rot occurs when leaves begin to die from the tip. At the base of the leaves you may see white fungal threads. Round, tan colored structures can form between the rotting leaves.
The only action you can take in these instances is to discard the infected bulbs.
Ink Spot (Bulbous Iris)
With ink spot, small streaks and spots on the leaves become larger and darken to a reddish brown.
Occasionally the spots can become gray in the center. When the weather is wet dark masses of spores appear in the center of the spots.
When infected with this disease irises will yellow and die prematurely. Bulbs which are heavily infected may rot before any flowering can occur.
Dealing with ink spots involves destroying the leaf debris as well as removing and destroying the infected bulbs.
You can apply a fungicide to the iris to try and protect them from further damage.
Leaf Spot
Leaf spot manifests as small brown spots with water soaked margins on the plant’s leaves.
As the disease develops the spots turn yellow and are bordered by reddish brown edges on the leaves which then die.
To manage this disease you should remove and destroy any infected leaves and leaf debris. You can use an appropriate fungicide on the plant to mitigate the damage.
Nematodes
Nematodes are a type of parasite which can attack irises.
They manifest as black streaks on the veins of the outer leaves of the bulbs. The basal plate of the plant is gray and separated from the outer scales by a dark sunken groove.
The only treatment for this pest is to destroy any infected bulbs and plant only in nematode free soil.
Soft Rot
The signs of soft rot are leaves suddenly collapsing or alternatively, dying gradually from the tips.
Infected leaves will emit a foul smell from their base and infected rhizomes are soft and also foul smelling.
You should destroy any infected rhizomes and not put them on the compost.
The cause of the soft rot is often a bacterial infection which has been allowed to gain entry to the rhizomes through the action of iris borers. If you treat these you will reduce the chances of soft rot.
Virus
Virus symptoms on irises can look like mosaics on the flower stalks and spathes.
This looks like a yellow-green stippling on the plant as well as stunted growth. The latter is caused by a severe mosaic virus.
A lot of irises will tolerate viruses but in severe cases you should destroy any obviously infected plants.
There are many viruses which can affect irises including:
Bean yellow mosaic
Iris mild mosaic
Beardless iris mosaic
Broad bean wilt
Bearded iris mosaic
Cucumber mosaic
Narcissus latent virus
Tobacco rattle
Iris severe mosaic
Tobacco ringspot
Some viruses will attack the whole plant while others will only affect certain parts such as the leaves or bulbs.
Pests
Iris borers are the caterpillars of moths that overwinter in the foliage of irises as eggs and are a particularly nasty pest.
The eggs hatch in the leaves of the plant and the caterpillars then bore into the leaves before tunneling into the rhizome on their way to the soil where they metamorphose.
Not only are you left with the direct damage from the iris borers but the holes that they leave behind give diseases such as soft rot an easy foothold.
Lots of different beetles like the taste of plant leaves and your irises will not be spared from these hungry bugs.
The damage that they can cause to the foliage of your irises not only looks unsightly but can give entry to infections.
Aphids are one of the most common pests in the garden and can attack a range of different plants including irises.
Thrips are tiny insects which can affect both the foliage and the roots of a plant.
Both aphids and thrips will pierce the plant to feed on the sap of the leaves. Thrips can affect the rhizomes of irises while aphids are capable of transmitting viruses from plant to plant.
How To Help With Disease & Pests
Diseases that infect the leaves of the iris plant can be managed and treated by removing the infected leaves and treating the remaining foliage and flowers with fungicide.
If there is a disease that affects both the foliage and the bulbs you will typically have to destroy the whole plant.
Cutting the flower stems back after flowering and pruning back the foliage in the fall will remove the conditions that iris borers use to hatch.
This helps to reduce the instance of iris borers particularly if you trim the foliage back to around six inches.
Dividing the rhizomes of your irises will also help you to remove any that are showing signs of boreholes or soft rot. This helps to prevent the continuous cycle of the infection by iris borers.
Neem oil can be used to treat and protect your irises from pests and even from some fungal infections.
Propagating Irises
One of the easiest ways to propagate irises is to divide the rhizomes from your existing irises and plant them elsewhere or share them with family and friends.
Always make sure the rhizomes you are planting or are giving away are healthy and free from rot and disease.
Another way to grow irises is to raise them from seeds which will take a little longer but can be very rewarding.
Growing Irises From Seed
To propagate irises from seed you will need to resist the urge to deadhead the flowers once they have finished blooming.
The seedpod will be a green lumpy oval on top of the flower stem once the bloom has faded.
Wait until it begins to ripen and turn brown. It will then start to split open, and you will be able to see the golden brown seeds.
This is when you can cut the seedpod off from the flower stalk and store the seeds in a cool, dry place.
You should keep them for another couple of months in order to let them dry out a bit more.
When the weather cools in the fall, and you are ready to plant the seeds, make sure that the area is properly prepared with amended soil.
This means that you have added compost to the flower bed.
Make sure that it is a weed free area too as you don’t want the irises to have to compete for space, food or light. Plant the seeds to around ½ inch to ¾ inch deep and a few inches apart.
By spring around half of the seeds should have sprouted, they will look like grass at this stage. Once they are a few inches tall you can move the young plants to their permanent location.
Leave the nursery bed undisturbed for another year as the remaining iris seeds may sprout the following spring.
You may be surprised to see that the irises that you grow from seeds do not look like the irises that you harvested the seeds from.
This is because irises take their characteristics from either parent plant and can look like one or the other or a combination of both.
When you divide rhizomes and propagate irises from them, you are effectively cloning the parent plant, so the resulting new irises will look exactly the same.
One of the fun things about growing irises from seeds is that you don’t know what you are going to get until they grow.
Care Of Irises
Whether you propagate irises from rhizomes or grow them from seeds you’ll need to know how to care for them.
This will include knowing the right kind of soil conditions, how much light and water they need and the best environmental situation for optimum growth.
Soil
The most common irises, bearded iris, will thrive in most well drained soils.
For heavy soil such as clay you should add some compost or other organic matter to improve the drainage.
An ideal pH for irises is slightly acidic, around 6.8.
Adding gypsum to clay soil can help improve it, but irises are reasonably tolerant of less than perfect soil. To balance acidic soil add lime and to balance alkaline soil add sulfur.
You should also not plant irises too deeply in the soil.
In fact bearded irises should have just an inch of the rhizome below the soil with the rest exposed to the sun.
Beardless irises can go to around 2–3 inches below ground but no deeper than that.
Do not cover the rhizomes in mulch, just mulch up to them without covering them.
Light
Most irises prefer full sun which actually means at least six hours of direct sunlight each day.
Some varieties will tolerate a little shade as long as they are getting this minimum of sun per day. In extreme heat they will need some shade.
Water
There are three times when irises need to be watered. Once when the iris is first planted and until the roots have taken hold.
At this point the soil should be moist but not waterlogged.
A good indication that the roots have taken hold is when you see the center leaves appearing. This typically happens within 2 to 4 weeks.
When the plant is established, reduce the watering until the fall or winter rains set in.
If you experience very dry spells more than 4 weeks long you should give the irises a deep watering every 3–4 weeks depending on the temperature.
Early spring is the next time your irises may need to be watered.
Nature will take care of this unless there is no rain, and you’ll have to step in with watering every other week.
The third instance when irises need water is when they are reblooming, and they need the water for developing new stalks and flowers.
Temperature
The best time of year to plant iris rhizomes is about six weeks before the ground freezes.
In the north of the country bearded irises can be planted from July to September while in southern climates you can wait until early November.
Beardless irises should ideally be planted in the fall or spring as they don’t like the heat. Trying to get established in the summer is too stressful for them.
Fertilizer
You should fertilize your irises in early spring or 6–8 weeks before they flower.
Once they have finished blooming you should fertilize them once more. The type of fertilizer you use will depend on the type and condition of your soil.
One of the most important things to remember is not to use a fertilizer that is too high in nitrogen as this will promote rot problems.
If you are not sure of the pH of your soil you can buy a testing kit at your local gardening center or hardware store.
The soil should ideally be neutral which is between 6.5-6.8 with medium to low nitrogen, high phosphorus and a medium level of potassium.
Phosphorus is good for root development and as the rhizome is all root it does require a lot of phosphorus.
Potting Irises
If you love the color and style of irises but don’t have a large garden you’ll be glad to know that irises do well in containers too.
Although they are not typically a container flower if the pot is big enough they can do very well. Big pots will allow the irises to develop their robust root systems.
They will need special attention in order to thrive in the container particularly when it comes to watering and access to sunlight.
For the latter they should be placed in an area where they will receive full sun.
To thrive irises will need a well draining potting mixture in the container to prevent them becoming waterlogged. This reduces the likelihood of root rot.
For ease of management dwarf irises do better in plant pots and containers than the larger varieties which will need to be staked to keep them secure and upright.
Overwintering
The majority of iris varieties are hardy enough to survive the winter without any particular protection.
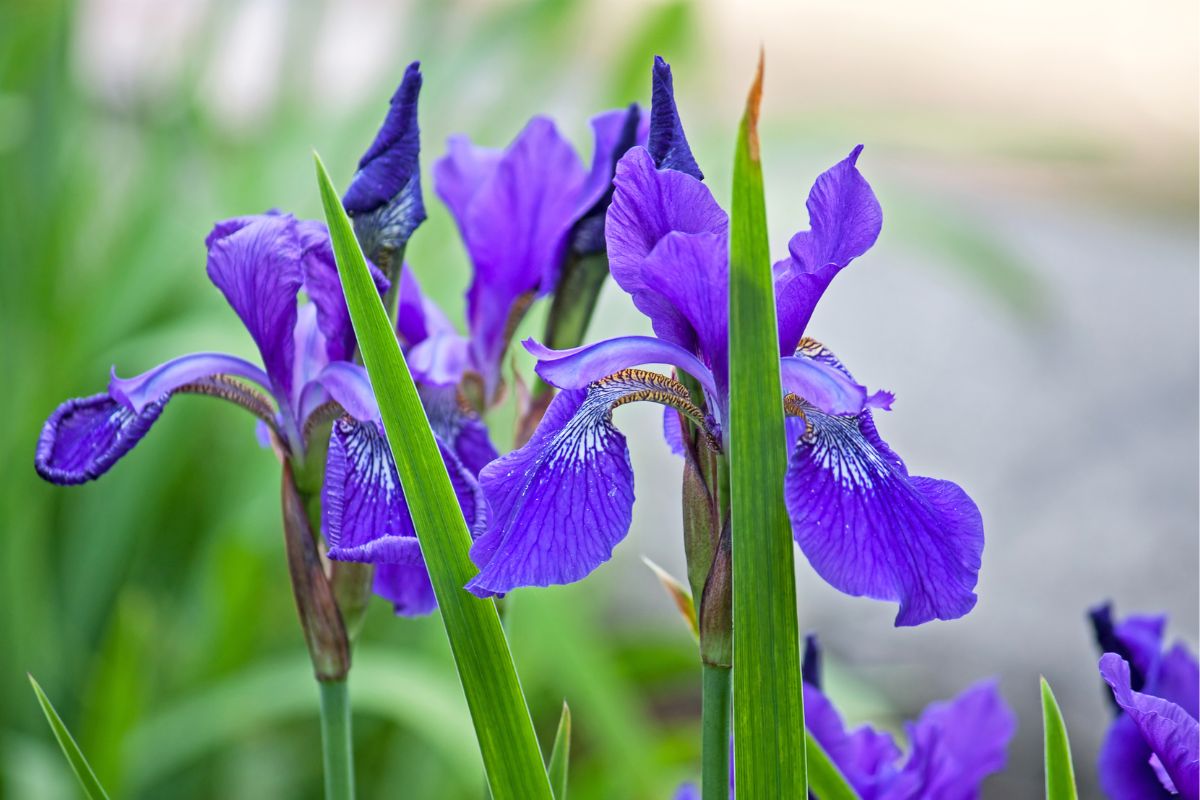
However, some like the Siberian Flag may need more protection for the chill over the winter. For these more sensitive flowers a little more winter preparation is needed.
Cut back the flower stems after flowering to about four inches above the root ball, removing any discolored leaves or wither tips.
In the autumn cover the irises with evergreen boughs or a layer of straw to protect them from exposure to frost.
Encouraging Bearded Irises To Bloom
When you have planted new rhizomes and protected them over the winter you will be hoping for flowers in the second year of growth.
So what can you do to encourage bearded irises to bloom?
As long lived perennials, irises typically bloom year after year without much interference or help from you.
But if your irises fail to bloom, or you are getting very few flowers you might be wondering what you can do to encourage them to bloom.
Crowding
If your irises are too crowded then they will struggle to flower. This is where dividing the iris rhizomes we discussed earlier comes in.
By dividing up the rhizomes and replanting you can remove any unhealthy parts of the rhizome but also give each plant more room to grow.
Iris rhizomes should be divided every 3–4 years by default although if you are in a cooler climate this can be longer.
On the other hand in warm, humid conditions you may need to divide more frequently.
Planted Too Deep
Iris rhizomes should be planted in a shallow horizontal hole and not deep like other bulbous spring flowers.
This allows the rhizome to have enough air flow around it to stop it getting too wet and rotting. More often than not an inch or two of soil is sufficient for irises to grow in.
For a larger patch of irises you can plant groups of three rhizomes together, although you should give them plenty of space, planting them 12 to 20 inches apart.
The taller the iris cultivar the further apart you should plant them.
Some tall varieties may need to be staked for support.
Not Enough Sun
Irises need at least six hours of direct sunlight every day so if they are not getting this they will most likely fail to bloom.
However, in areas with extreme heat some dapple shade is necessary to stop them getting scorched.
As a general rule though the more sun the better for irises. This is why they should be planted in an open space without impediment.
After initial planting if you find that now your irises are surrounded by taller plants or trees which are casting shade you may need to move them.
This may seem extreme but is no different to the regular dividing and replanting of iris rhizomes.
Not Enough Water
As a plant that tolerates drought conditions you may wonder why not having enough water is an issue for irises.
Despite the fact that they will survive in dry conditions one of the ways in which they do this is by not putting out many flowers.
So if you want to encourage your irises to bloom giving them water after transplanting, in the early spring if there is not a lot of rain and after deadheading is the way to do that.
Remember that too much water is detrimental to irises and can cause rot in the rhizome and leaf spot.
Water only if there has not been enough rain and reduce the frequency of watering in the fall and winter.
The best way to water irises is in a ring around the rhizome to prevent water pooling directly around it. You should also avoid getting the leaves wet as this can lead to disease setting in.
Too Much Nitrogen
If there is too much nitrogen in the soil then like other plants, irises will use this to grow rich foliage at the expense of producing flowers.
To properly fertilize irises you’ll need to balance the amount of phosphorus to encourage blooming with the right amount of nitrogen.
Irises that grow around the edge of the lawn can fail to produce blooms. This may be due to absorbing nitrogen from lawn feed.
Similarly if you’ve been growing irises in the same spot for many years the soil may have become depleted of elements such as phosphorus.
The best way to determine the condition of your soil is to purchase a soil testing kit.
Once you work out which fertilizer is best you can add it to the soil in the spring before blooming and again after the irises have finished flowering.
Feed the fertilizer the same way you should water, around the rhizome rather than directly on top of it.
Pruning Too Early
Cutting back the leaves on irises too early can deprive the plant of much needed nutrients and energy through photosynthesis.
The iris needs to store this energy in the rhizome for the following year in order to bloom.
If the leaves are cut too soon the plant may not have the opportunity to gather enough nutrients and this can impact on the next year’s showing of flowers.
By leaving the leaves to turn yellow before cutting them back you will be sure that they have finished delivering nutrients to the rhizome and can be safely pruned.
It can take several weeks for the leaves to die back completely, but they are usually ready to be pruned in early fall.
Common Problems With Bearded Irises
The most common problems that occur with bearded irises are that they are prone to iris borer and leaf spot.
While neither of these issues are enough to kill the plants immediately they will weaken them to the point where the plant will finally die.
Iris Borer
The iris borer is caused by the iris borer moth which lays eggs in the leaf litter in the fall.
When the larvae hatch in the spring they feed on the fresh, new foliage of the iris and gradually move down the plant to the rhizome.
They will then bore through the rhizome to get to the soil underneath which is where they pupate.
The signs of an iris borer are brown streaks or collapsed foliage. You’ll need to dig up the rhizome and check for the caterpillar.
To save the plant, dispose of the caterpillar and cut out the damaged part of the rhizome.
Then dip the remaining rhizome in a solution of one part bleach to four parts water. This should be enough to sterilize it. Let it dry for a few days and then replant the rhizome.
Leaf Spot
Spotted leaves on an iris plant are signs of leaf spot which can either be a bacterial or fungal infection.
Both look similar, so it is difficult to tell for sure which is the culprit especially when both tend to show up in mild, wet weather.
However the fungal variety will persist even when the temperature gets below freezing. You will need to get rid of the infected foliage straight away.
Disinfect a pair of sharp garden pruners with a mixture of one part bleach with four parts water and cut the foliage off down to the rhizome.
Fungicide will help kill off any remaining disease if caused by the fungal variety.
If a bacterial leaf spot has attacked your irises then you will need to discard the whole plant.
Final Thoughts
Taking care of irises doesn’t stop as soon as the flowers have withered. There is a lot more to looking after these flowers than simply deadheading them at the end of the summer.
As we have seen there is a lot to consider when caring for irises.
To get the best from these perennial flowers good maintenance is essential throughout the year and that includes the time when they are not at their most showy.
The dividends that you will receive for the time taken over the fall, winter and spring will be there the following summer for you to enjoy.
We hope you have enjoyed this guide to caring for irises after they have flowered, and we hope that it has been helpful and informative for you.
Frequently Asked Questions
Should I Cut Back My Irises After They Bloom?
You should cut back your irises after they have bloomed, and the flowers have begun to fade.
Remove the dead heads so they don’t develop into seed pods taking energy away from the plant. Leave the foliage in place until the first sign of frost, however.
How Do I Get My Iris To Bloom Again?
Remove any dead heads after the flowers have withered and give them some extra water and fertilizer as an extra boost to produce more blooms.
As long as the plant is healthy and has enough nutrients it should produce another flush of blooms.
Hi, I am Diane Peirce, and I am one of the co-creators of MichWildflowers.com.
I love sharing my experiences with individuals in this community, and I enjoy sharing some of the best tips I have learned over the years caring for my own garden at home.
In my articles, you will find the best flowers, most fragrant flowers you can plant in your garden, how to care for your favorite plants, informative guides and how-tos so you can have the best backyard in town!