Available in a range of different sizes and colors, daylilies are reliable, versatile, and, of course, easy to grow – what more could you ask for?!
You’ll want to add these flowers to your garden as soon as possible. However, if you’re a beginner gardener, you may be wondering where to begin.
Moreover, if you’re looking to spread the love of daylilies, then why not divide the plants over the next few years? Here, you can collect and germinate your own daylily seeds.
With this in mind, this guide will explore everything you need to know about growing daylilies from seed to bloom – there is something both beginner and experienced gardeners can learn!
Let’s get started.
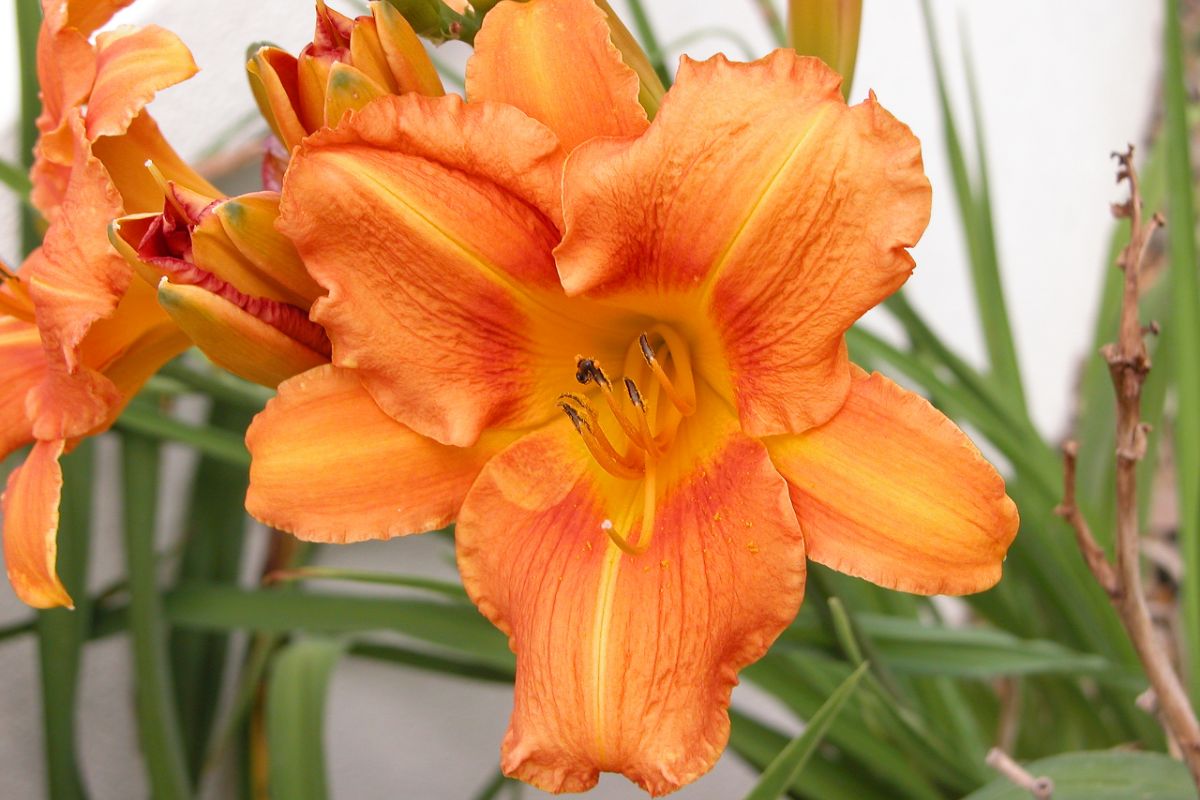
What Are Daylilies?
Daylilies (otherwise known as hemerocallis spp.) are one of the most popular flowers – this is for good reason, too.
They are drought tolerant, easy to grow, ideal for edging and borders, able to grow in moist soils, and unaffected by high temperatures.
These flowers are cultivated in a range of cool and warm shades, therefore, mixing well with various palettes.
When you take all this into consideration, these are the ideal plant for beginner gardeners who often receive these perennials as gifts from more experienced gardeners. The flowers themselves bloom reliably in the spring to late summer.
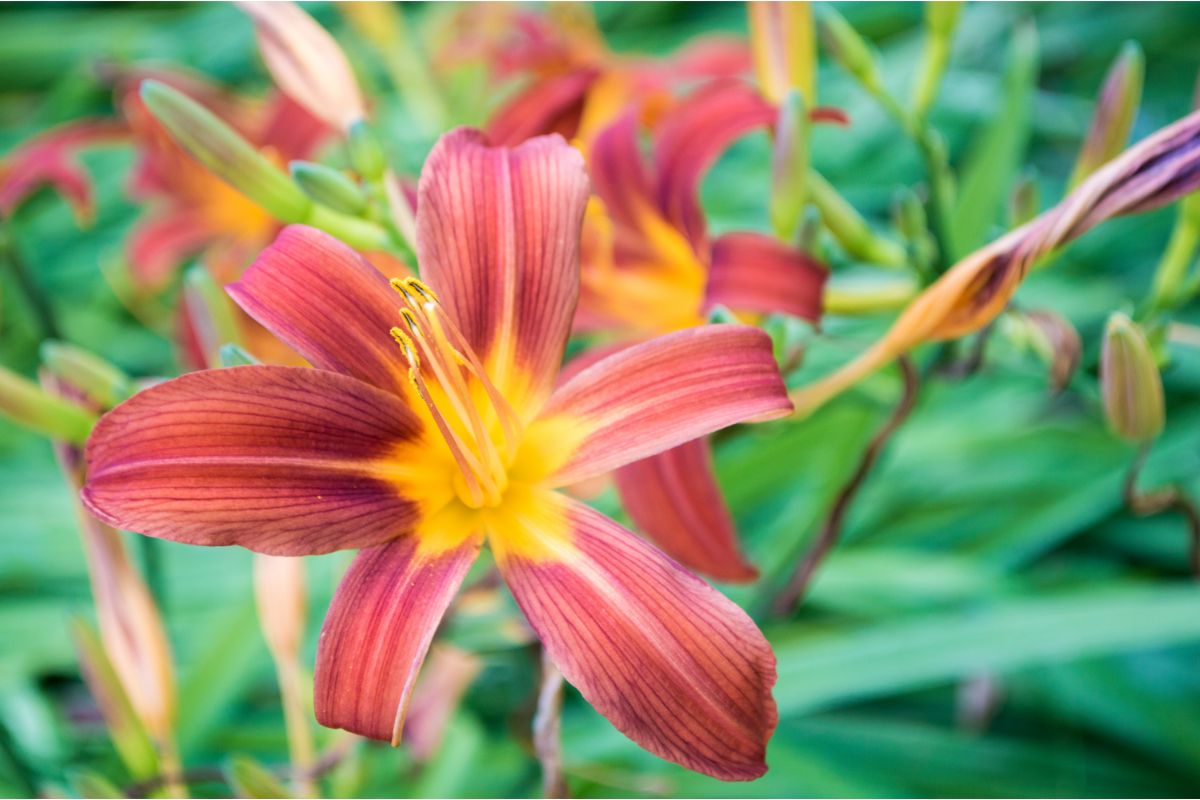
Plus, one of the most common varieties is the yellow Stella D’oro daylilies – which come in shades of orange, red, pink, and purple.
They come in various patterns, too, including “self” patterns (one solid color with potentially different colored throat or stamens) and electric polychrome patterns (blooms containing more than one color).
While these flowers are attractive to hummingbirds and butterflies – and, perhaps to your disappointment, deer, too –, you should keep in mind that they are toxic to cats.
As such, they can lead to minor symptoms, including lack of appetite, vomiting, and even serious conditions, such as kidney failure and, potentially, death.
That said, you’ll be happy to hear that daylilies aren’t toxic to humans or dogs. In fact, you can even eat some parts of these plants.
Growing Daylilies From Seeds
When it comes to growing daylilies from seed, you don’t have to worry about hybridizing. In fact, there are tons of methods to gather daylily seeds suitable for planting. These will be discussed in this section.
That said, if you are looking to hybridize, then you’ll be surprised at how great of a hobby it can be!
However, before we jump into how to grow daylilies from seeds, we’ll find a look into everything you need to know about harvesting your daylily seeds.
How To Harvest Daylily Seeds?
There are a number of ways you can get daylily seeds suitable for planting. While you may not be able to purchase them from a local store, they can be easily found online.
That said, below, we have outlined some other options to harvest your daylily seeds. These include:
Foraging
In the fall, you can check your daylilies for seed pods that have been created by pollinators – these are oftentimes completely viable.
Hybridizing
To achieve this, all you have to do is take two daylilies and transfer the pollen from one to the pistol of the other flower.
Here, you’re crossbreeding the flowers to create new seeds. These will grow inside a developing pod until it matures.
Daylily Auction
A great website to purchase your daylily seeds is the daylily auction. Essentially, this is an international source for the newest hybrid crosses, which you can purchase.
In the fall, the auction tends to be the most expensive. That said, after Christmas, the price begins to fall.
When it comes to hybridizing, you’ll want to ensure that each daylily contains the same chromosomal count. Then, you’ll want to dab each with the same (for instance, tetraploid to tetraploid, and diploid to diploid).
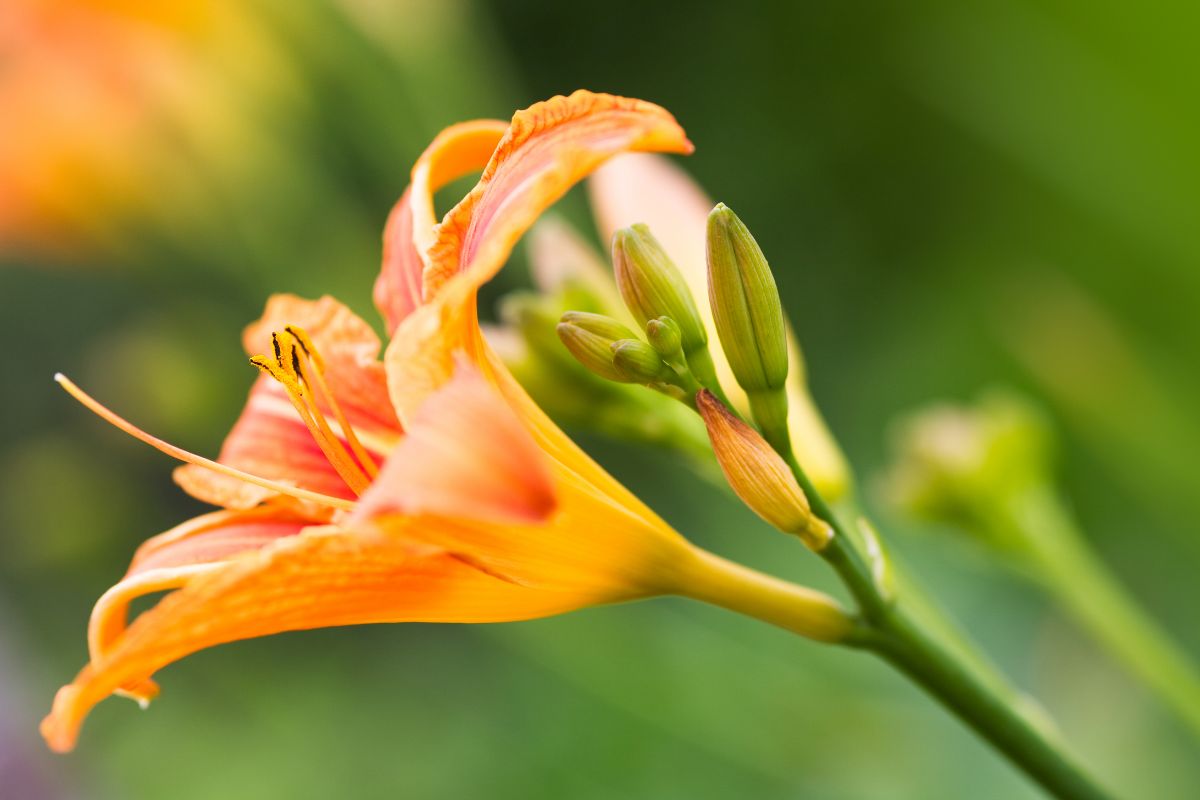
What Are Daylily Seed Pods?
After the daylilies have been fertilized, these are the structures that form. Within a few days of fertilization, these pods begin to grow.
Once the wilting daylily bloom drops from the stem, you’ll be able to see if there is a pod or not. If there is, you should see a tiny pod developing on the stem.
Inside these pods, you’ll find the daylily seeds. In approximately 2 months, they grow to maturity.
That said, this isn’t always the case. Sometimes, they can grow, only to wither away after a couple of weeks.
Although, if the viable seeds inside the pod aren’t affected by insects or other agents, including mildew or mold, then they will grow and mature.
You’ll know they are mature when they turn brown or beige in color. That said, some varieties remain green in color.
Moreover, once they have reached maturity, the pods themselves will crack open and reveal seeds inside. You can even apply slight pressure to open the pods and push them out.
If you choose to do this method and it does in fact open, then you’ll know the seeds are ready to be planted.
You should aim to grow your daylilies 56 days after dabbing the plants. Then, you should use a tag to label all your crosses and place this at the base of your flower.
Some pods can be harvested up to 10 days before the desired duration – as long as they have matured and opened up.
That said, some may take longer than others. Therefore, it is important to allow your daylily pods to mature in their own time – making sure you don’t harvest them too early.
Where Are Daylily Seeds?
You can find daylily seeds inside the seed pod – the form when the flowers have been successfully fertilized. When achieved, they can be found on the top of the stem where the bloom sat.
It will take around 2 months for the pod to grow and for the seeds inside to mature. The pod itself will be brown or green in color and vary in size depending on the species.
To ensure the seeds are viable for planting, you’ll want to leave the pod to mature on the stem. You don’t want to harvest them too early.
Before harvesting, you should be easily able to open the pod using a gentle squeeze, or they will open on their own.
After the pod has matured and cracked open, you’ll know that the seeds are mature and ready to be harvested.
How To Harvest Daylily Seeds?
Once the seed pod has completely matured, you can remove it from the daylily stem. Then you can collect the seeds inside.
Here, you’ll want to transfer the seeds into a clean ziplock bag – folding back the edges to create a bowl.
For 48 hours, you’ll want to allow the seeds to air dry.
Once this is done, you can lock the bag and put it in the refrigerator.
This method is convenient if you’re looking to dry and store your seeds at the same time – especially if you have a lot of seeds to process!
What Do Daylily Seeds Look Like?
Depending on the daylily variety, their seeds can vary significantly in size. For instance, diploid seeds tend to be smaller than tetraploid seeds.
Likewise, the seeds can vary in size from 0.4cm to 0.75cm. Mature seeds tend to be shiny and black, plus they are either round or oval in shape. When the seeds are brown or white – it is an indication that they are immature.
How Long Do Daylily Seeds Last?
The more time that passes, the less viable your daylily seeds will become and the less likely they will grow. While you can sometimes grow old seeds, the fresher they are, the more success you’ll receive.
If you have some seeds hiding at the back of your refrigerator, then there is no harm in planting them, you may be rewarded with great results.
Although, you should keep in mind that seeds stored at room temperature over many years are less likely to germinate.
Storing Your Daylily Seeds
If you have created the crossbreed yourself, then you’ll want to label the bag to identify the species.
After harvesting, you can store the seeds inside the fridge until ready for planting.
Here, they can be stored in a dry state for up to a year. However, make sure not to add any moisture to the bag, otherwise, they can begin to germinate.
Preparing Daylily Seeds For Planting
When it comes to preparing your daylily seeds for planting, to achieve the best possible result, you’ll want to perform cold stratification on your seeds – whereby they need to be placed in the fridge for 30 days.
Stratifying Daylily Seeds
If you’re looking to stratify your daylily seeds, there are a number of different ways to do so.
First, if you’re unfamiliar with the process, essentially, it involves the breaking down of the seed’s outer layer – allowing the embryonic part to germinate properly.
Moreover, some seeds require cold durations to help break their dormancy. Keeping your daylily seeds in a moist and cool environment aids in germination.
That said, just remember, if you add moisture to the seed’s bag – that has been kept in the fridge – then they will start to germinate.
Therefore, you’ll want to keep your seeds in a dry bag inside the fridge – this will prevent them from germinating early.
Once you add moisture to the bag – including a wet paper towel or vermiculite – they will be able to germinate if viable.
While all the seeds won’t germinate at exactly the same time – they will start the germination process.
Below, we have outlined the best methods to germinate your Daylily seeds:
Add moisture to your ziplock bag of Daylily seeds in the form of vermiculite. Store in the fridge for one month and then plant.
Alternatively, you can wrap your seeds in a moist paper towel and place them in a ziplock bag in the refrigerator. You’ll want to be careful with the method and make sure the daylily roots don’t weave into the paper towel. If this happens, be careful when removing them. After one month, you can plant them.
Lastly, you can soak your seeds in peroxide to help in germination. Here, you’ll want to use equal amounts of water and peroxide.
If your seeds begin to sprout before the month has ended, then you can get away with planting them at that time, too.
Is Cold Stratification Necessary?
In order to break their dormancy, daylily seeds require cold, moist stratification to achieve germination.
When moisture is added to the cold stratification process, you’re more likely to achieve great results.
Caring For Your Daylilies
Clumps of daylilies can grow between six inches to five feet tall. Plus, they can reach a span of two to four feet wide.
As such, you’ll want to space the bare roots around three feet apart (however, if you’re looking for a more dramatic display, you can minimize this to 18 inches apart).
You can plant the roots in early spring or early fall – a month or sooner before the hard frost. For another living in the northern hemisphere, the spring is the best time to plant the roots – where they can develop in the summer before the cold winter arrives.
When it comes to planting your daylilies, all you have to do is measure a diameter or two feet and loosen up the area of soil.
Once done, here, dig up a hole that is one foot deep, approximately the same size as the root. If the soil is poor, amend it with some compost.
You’ll want to plant the crown around an inch below the soil, angling the roots slightly downwards and outwards.
After, you’ll want to add the soil evenly to the area – making sure to generally stamp out any air pockets.
Once the hole is around two-thirds full, provide the seed with plenty of water. Then fill the rest of the hole with soil so the crown is approximately an inch under the soil. Then water again and wait for your daylilies to sprout.
Common Plant Diseases And Pests
Generally speaking, you don’t have to worry about pests with daylilies. Most animals tend to avoid them – including rabbits! –, however, some deer may see them as a tasty treat.
Make sure to pick up any fallen leaf litter around the crown of the plant to prevent the occasional snail or slug from coming into the area.
Plus, in the early spring, you always check for aphids around the first buds, as well as spider mites, and even thrips in hotter climates.
If you come across any pests, you can easily clean them with insecticidal soap.
Soil
While daylilies are able to thrive in all types of soil, they prefer to be planted in soil that is loamy and fertile.
The most important thing you’ll want to remember about the soil is that it is moist. Clay or sandy soil is sometimes too dry.
To help retain moisture, you can try adding compost. Moreover, the soil should be well-draining to prevent cases of root rot.
Light
Since daylilies love bright, full light, you’ll want to ensure that they receive a minimum of six hours of sunshine each day.
In hot environments, keeping them in the shade in the afternoon can be advantageous (that said, it could reduce the number of blooms you receive).
Darker species of daylilies prefer the afternoon heat – this also helps them to retain their colors, too.
Humidity And Temperature
Daylilies are tough little plants that can withstand most temperatures and a range of humidity levels, too.
About once a week, the flowers prefer an inch of moisture. That said, it can relatively survive dry periods unscathed.
Water
During the first growing season, you’ll want to ensure you’re watering your plants regularly. After this period, you’ll only need to water your flowers in very dry weather.
To retain moisture in the soil, consider using mulch – this protects it from the cold winter climates.
Pruning
You should avoid allowing your daylilies to go to seed unless you want to propagate them. Like many other plants, producing seeds takes up a lot of the plant’s energy. Therefore, this impacts flower production.
As such, make sure to remove any seed capsules once you spot them – cutting each scape to the ground.
Likewise, throughout the growing season, you’ll want to remove any yellowing flowers, too. This helps to encourage new leaf production.
If you prefer, you can remove spent blooms, as well. To do this, simply twist the wilted bloom in your fingers until it comes off.
Fertilizer
Generally, daylilies don’t require any fertilizer. Therefore, all you need to do is add some compost each season to amend the soil and provide your plant with the necessary nutrients.
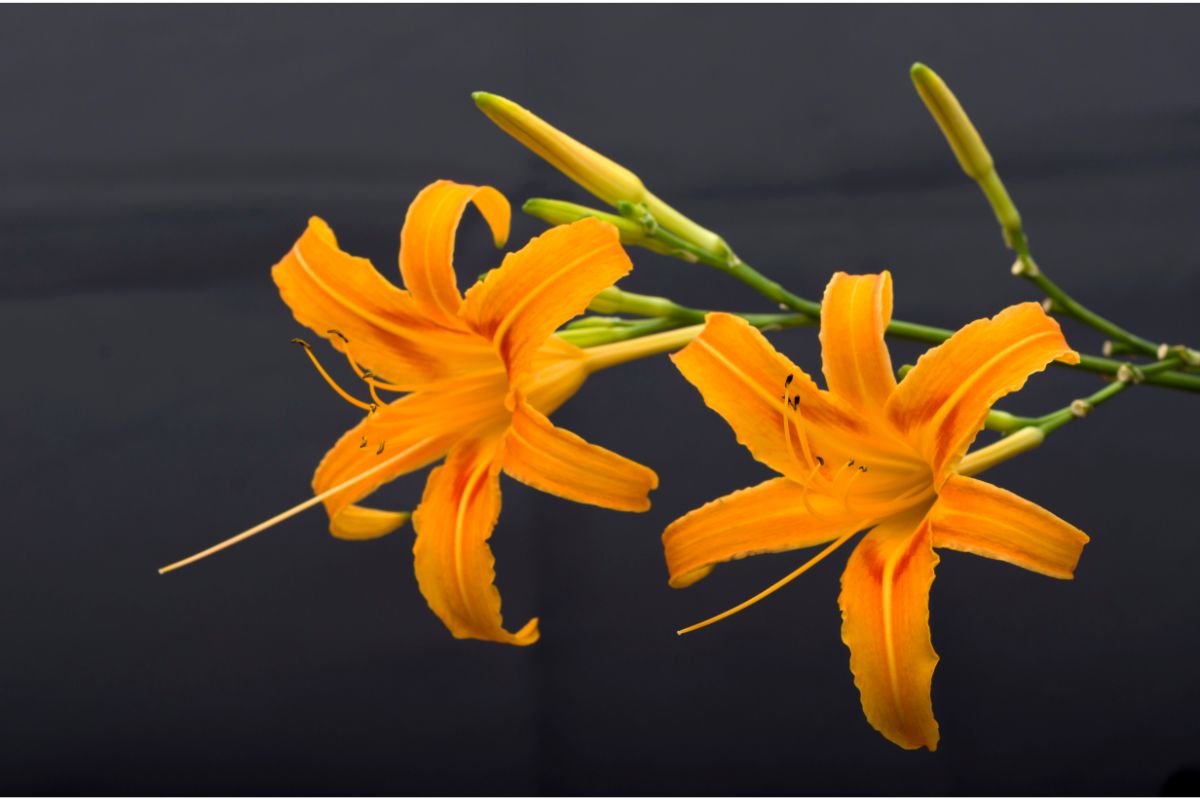
Daylily Varieties
While there are thousands of daylily varieties available, some of the most popular cultivars include:
Purple D’Oro
This is a variety of reblooming daylily. It can be categorized by a lavender-purple color that blooms in the summer and in the fall.
Stella D’Oro
This is a type of reblooming daylily. It is a vibrant yellow-golden flower that puts on quite a show during the summer mothers – reblooming later, too.
Autumn Red
This variety is hardy between zones 2 and 9. The flower itself is large and bright, featuring striped petals and yellow eyes.
Crimson Pirate
This variety features a stunning array of colors with red accented by golden-yellow and a gentle yellow throat. Here, the petals are elongated and narrow.
Lemon Lily (H. lilioasphodelus, H. flava)
The stems of this flower are able to reach three feet tall – its lemon-yellow flowers are fragrant and bloom between May and June.
Citron Lil (H. citrina)
This type of daylily is able to grow three feet tall! The flowers bloom at night and contain a sweet lemon scent.
Final Thoughts
Not only are daylilies incredibly beautiful but they are super easy to grow, too, and, with the help of this guide, you should have no trouble growing your flowers from seed to bloom.
There are two important factors you want to keep in mind when growing these perennials. Firstly, you’ll want to ensure that you don’t overwater them, and, secondly, you’ll want to ensure they germinate properly before planting.
Hopefully, this guide has informed you on everything you need to know about planting daylilies from seed to bloom.
Frequently Asked Questions
How Often Do You Need To Water Your Daylilies?
You should regularly water your daylilies. That said, this shouldn’t be too often. You should keep in mind that daylilies require a period of dormancy.
Watering your seeds too often will cause them to rot or even germinate too early. Therefore, you’ll want to provide the right amount of water to achieve the best development and growth.
Therefore, you’ll want to ensure that the soil is evenly moist. This can be achieved by providing ¼ of water every other day.
A simple way to remember this is that if the soil is dry to the touch, then you’ll want to water them again.
Once your seeds have successfully germinated, then you can water your daylilies more often. That said, you’ll want to avoid overwatering, too, which can cause the seedlings to become too wet and rot as a result.
Therefore, you’ll want the soil to be slightly moist as opposed to soggy. Moreover, you’ll need to periodically fertilize your daylily seeds, too.
Here, you can use a balanced fertilizer consisting of a 10-10-10 ratio – applying it to your flowers every two to four weeks. This provides your flowers with all the nutrients they need for development and growth.
If you follow these steps, you should be rewarded with daylily seeds that grow into successful flowers.
With the required warmth, fertilizer, and water, your seedlings have the potential to grow into beautiful and healthy flowers.
What Is The Best Type Of Soil To Grow Daylilies?
If you’re looking to add a splash of color to your garden, then daylilies are a great way to do so. That said, the type of soil you grow them in can greatly determine how successful they’ll be.
You should always keep in mind that daylilies are extremely prone to root rot when exposed to moisture for long periods of time. Therefore, choosing soil that has good drainage is essential.
The best soil for daylilies is one that combines a light and airy mix – providing plenty of drainage. A good mixture will become one part perlite, one part peat moss, and one part compost.
Besides good drainage, you’ll want to ensure that daylilies’ soil is rich in nutrients. You can achieve this by mixing slow-release fertilizer with compost when getting the soil ready.
Then, make sure you evenly distribute the soil to the areas you’re looking to plant your flowers. Once done, it is time to plant your daylilies!
Here, you’ll want to plant them around a quarter of an inch deep in the soil and then re-cover with more soil.
To keep the water moist, make sure to water the seeds gently – you don’t want to let the soil dry out as this could cause them to die.
Once your seeds have successfully germinated and started to grow, you’ll want to make sure to keep an eye on the soil conditions – ensuring it isn’t too wet or dry.
If the soil is too dry, then water it gently. On the other hand, if it is too wet, add additional compost or perlite to help with drainage efforts.
Hi, I am Diane Peirce, and I am one of the co-creators of MichWildflowers.com.
I love sharing my experiences with individuals in this community, and I enjoy sharing some of the best tips I have learned over the years caring for my own garden at home.
In my articles, you will find the best flowers, most fragrant flowers you can plant in your garden, how to care for your favorite plants, informative guides and how-tos so you can have the best backyard in town!


")
![How To Save Zinnia Seeds [Harvesting And Storage]](https://michwildflowers.com/wp-content/uploads/2023/05/How-To-Save-Zinnia-Seeds-Harvesting-And-Storage-150x150.jpg "How To Save Zinnia Seeds [Harvesting And Storage]")


