Both the blooms and the foliage contrast perfectly with the other plants found in the garden, which is why so many people make a point of having daylilies in their gardens.
As a result of this, people are often stuck with how to properly look after their daylilies and one of the most commonly asked questions about daylilies is “how do you transplant them?”
It might sound like a difficult task, but dividing and transplanting your daylilies is a much easier process than you might initially think, and while it’s a daunting idea, this guide is here to help you transplant your daylilies successfully.
If you’re looking for a guide to the proper techniques to use when transplanting daylilies, as well as a load of other helpful information and tips to ensure that your transplantation is a success, then all you need to do is keep reading, and we’ll explain everything you need to know.
What Are Daylilies?
Before we can begin to dig into the details on the best way for you to transplant daylilies, we’re first going to take a closer look at the plant in general, which is especially important for those who are first time growers of the wonderful plant.
Often referred to as Hemerocallis, daylilies are a part of the Hemerocallis genus, and are a perennial plant that flowers.
Many people are drawn to daylilies due to their beautiful appearance, which is characterized by their tall and straight stature, with their leaves having a sleek, flowing, and almost fountain-like appearance.
Across the period of a month, a daylily will provide you with a number of blooms, unfortunately each of these blooms will only last around a day, max. But the frequency in which they bloom will make up for their short-lived nature.
Another one of the reasons why so many people like daylilies is thanks to the sheer variety which they can come in, with everything from larger eye zones, to sharper-edged blooms.
There are also a wide range of colors to choose from too.
One of the interesting things that you can do with daylilies is hybridizing them, which means that you can create entirely near varieties based upon the ones you already have, which opens up a whole range of new possibilities.
If you’re someone who enjoys hybridizing daylilies, then the likelihood is that you’ll soon end up with quite the collection of daylilies, and will likely need to move some in order to ensure that they have enough room to grow.
This is why knowing how to safely and properly transplant your daylilies comes in, so if you notice that some of your daylilies are going to need moving soon, then you might want to familiarize yourself with the process before you need it done.
Whether you plan on keeping all of your new seedlings for yourself, or plan on giving them to friends and family, by knowing how to transplant properly, everyone will be able to enjoy the gorgeous sight of these plants in their own garden.
Thankfully, daylilies are one of the easier plants out there to transplant, so even if it’s something that you’ve never done before, with the help of this guide, you should easily be able to transplant your plants.
Why You Should Transplant Your Daylilies
For those who are new to owning daylilies, you might be wondering what the need to transplant daylilies is at all.
Well, as any experienced daylily grower will tell you, there are a number of reasons why you might need to transplant these plants.
Overgrowth
The first reason (and arguably the most likely) reason you’ll need to transplant your daylilies is that they’ve overgrown.
It’s extremely common for daylilies to develop and grow into particularly large clumps, which means that you’ll need to be able to lift them out and divide them. Relocation is also a good idea in this case.
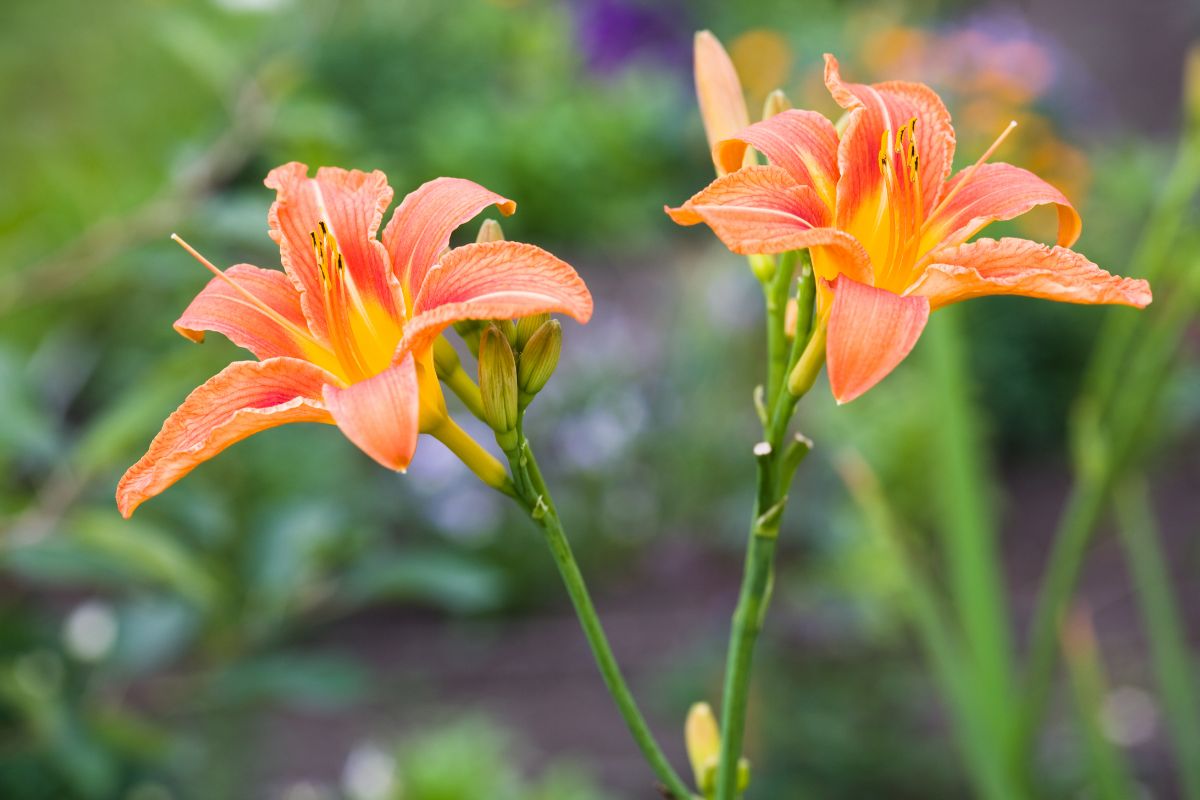
While there are a range of species of daylily, Hemerocallis fulva is arguably the most common, and is better known as the Common Orange Ditch Lily.
The distinctive orange color and overall simplicity make it a popular choice in people’s gardens.
However, if you’re familiar with this species of daylily, then you’ll also be aware that it is renowned for its tendency to grow and spread quickly, especially since it typically grows in larger groupings.
This daylily is able to spread so fast thanks to the underground tube root system, which is why it’s able to grow in such large groups, and why you’ll often need to dig it up and divide it where necessary.
Managing overgrown daylilies is easy enough, as you simply need to dig them up and divide them, before placing the divided amount back into the same space. The extras can either be given away, or culled if necessary.
When daylilies overgrow and group like this, the systems underneath the ground will often be rather well established, but doing this before the root system is able to develop fully for the growing season will make this task much easier.
Even then though, it might still take a bit of work to manage to separate them.
Relocation
Another common reason for needing to transplant your daylilies, is simply just because you wish to move them!
Gardeners are always looking to create the best looking displays possible, so if that means moving your daylilies from one place to another, then so be it.
If you’ve got something of an artistic or creative eye, then you might just notice that a particular color or style of daylily will complement the flowers in a different section of your garden than the one they’re currently in, which is why knowing how to transplant is such vital knowledge.
Overpopulation
While it might seem like a repeat of the first reason, the overpopulation of daylilies is a separate issue altogether, and those who already have daylilies in their garden will understand what we mean.
If you’re growing and hybridizing different daylilies in your garden, then chances are you’ll have one huge section dominated by the plant and its various species.
If this is the case, then you’re probably considering transplanting at least some of the daylilies to a different part of the garden to keep your display varied and interesting.
That being said, you won’t always need to thin out your daylilies, and ultimately it depends on the species of daylilies you’re growing in the first place.
Some daylilies will grow large and overgrow into a huge clump, while others might stay the same size for a number of years.
You should only really consider thinning out your daylilies if they’re overgrowing their space, or because you want to relocate them.
When You Should Transplant Your Daylilies
Knowing when the best time to transplant your daylilies can vary depending on the condition of the zone in which they’ve been grown in.
You should always try to be aware of what each of the zones in your gardens are, and you can always find this out by searching online, as there will be multiple guides providing you with the details on what zone you find yourself in, which is based on the climate you live in.
For example, those who live in zone 5b, which is considered to be a slightly colder zone than some, will want to transplant their daylilies in either the late spring or the early summer for the best results.
This will ensure that the plants have enough time in their new environment to re-establish their roots and to get ready ahead of the winter frost and cold.
You’ll also want to ensure that your daylilies are of an adequate size before you go ahead and transplant them. In colder zones, smaller daylilies will suffer during the frost in the winter, and will likely just get upheaved.
If you’ve got a larger clump of daylilies, then you should have no issues with transplanting them well into the fall, as they’ll stand a much better chance against the frost.
If you do need to transplant small seedlings, although it depends on your exact zone, as a general rule you’ll want to make sure that they’re in the ground no later than July, which should provide them with enough time to lay new roots.
Warmer zones need to be wary of transplanting during the warmer months though, as it can cause an excessive amount of stress on the plants, which can cause a number of other problems that will require a lot of time and effort to resolve.
If you do have to transplant in the summer months, then you’ll want to do it as early as you can in the day, before the sun reaches its peak temperature for the day.
How To Transplant Your Daylilies
Now that you’re more aware of when the best time for you to transplant your daylilies are, then it’s time for us to begin looking at exactly what you need to do in order to ensure that you successfully transplant your daylilies.
So, ensuring that you’ve chosen the right time of year to transplant your daylilies, let’s get started!
Digging Up Your Daylilies
The first step to a successful transplantation is to dig up your daylilies. This part is always the scariest part for those who have little experience with plant transplants, but don’t worry, as it’s always safe to do.
You’ll need to pick a clean and sharp shovel, as you’ll want to make as little of a mess as possible, so that you don’t disturb the rest of the plants in the surrounding area.
With your shovel ready, you’ll then need to identify the clump of daylilies that you’re looking to dig up, and then position your shovel around six inches away from the plant itself.
You can then begin to dig a circle all around the plant, maintaining the same distance from the plant at all times.
As you dig around the plant, you’ll need to ensure that you are pushing the shovel downwards into the ground, which will help to ensure that the plant is going to come loose from its established position in the ground.
This is especially important if your daylilies have resided in the same spot for a long time, as their base will likely be much stronger than if they’ve only been there for a few months.
With the initial circle complete, you’ll then want to go digging around the circle for a second time. This time, however, as you come to complete the circle, you should feel the clump begin to break free from the surrounding area.
With the clump separated, you can now gently lift it out of the ground.
Be careful doing this, especially if you’ve been using heavy clay soil in the plant bed, as the clump might be much heavier than you expect, and lifting it improperly could lead to injury.
With your clump of daylilies now removed from the ground entirely, you can now choose whether you want to divide them up, or simply relocate the whole clump to a new location.
Dividing Your Daylilies
Dividing your daylilies is a relatively simple process, so you shouldn’t have too much trouble getting them separated and ready for transplantation.
With your daylilies out of the ground, simply use a sharp knife, or some garden shears, to cut through the root system connecting your daylilies together.
With your daylilies separated, you’ll want to just trim off any noticeable dead roots, and then you’re ready for them to re-enter the ground!
Transplanting Your Daylilies
With your daylilies divided, it’s now time for us to look at how you transplant your daylilies into different areas of your garden, or someone else’s garden entirely.
If you’ve divided up your daylilies, then you’ll need to wait until some of the wounds have healed before you can plant.
Although you are able to plant them directly after dividing, and there should be no problems if you do this, it’s typically recommended to give them some time to heal.
You’ll definitely need to wait if you live in an area that is susceptible to crown rot though, and it’s recommended to allow the root to dry for 24 hours before you plant it again if crown rot is common in your area.
You should also ensure that the planting hole your daylilies are going to be transplanted contains high-quality soil and compost, as it will make the transition to the new area much easier for the plants themselves.
When transplanting your daylilies, the crown of the plant should be no deeper than an inch under the soil, as burying it any deeper will place your daylilies at the risk of crown rot.
Picking the correct spot for your daylilies is extremely important, while daylilies will be able to grow and flower when grown in partial shade, they won’t quite be able to grow to their full potential.
Therefore, it’s best to pick a spot in the garden where your daylilies are going to be provided with plenty of sunlight, which will allow them to grow properly.
The soil used is also particularly important. Average soil will suffice if it’s all you can get your hands on, but soil packed with nutrients and compost is going to help them grow even better.
The best soil for this will be something like clay soil, which is revered for being full of helpful nutrients for your plants.
If you’re transplanting your daylilies into a pot, then you’ll want to ensure that the planting medium you use is good quality, and it’s always worth adding a small amount of compost to your plant pots too to help.
How many daylilies you decide to plant in one location is entirely up to you, so it’s all about the aesthetic you want in your garden.
If you’re unsure of how many daylilies you should have in a single area, then typically most gardeners try to plant an odd number, with three to five being a common amount, as these are often the groupings most pleasing to the eye.
It’s always worth considering each of the daylilies you have too, as all of them will differ from each other in terms of their height, color, size, and shape, so pick the formation that allows each of the daylilies to complement each other.
For those who have daylilies that rebloom and have an extended flower production, then mass plantings always look amazing, so keep this in mind when it comes to deciding upon how you’re going to plant your daylilies.
Transplanting Daylilies – Tips And Tricks
Transplanting is a fairly easy process, and if you’re planning on becoming something of an avid gardener, then transplanting is a process that you’re going to need to become accustomed to as time goes on, as you’ll often want to move plants to different areas of your garden in order to help achieve a particular aesthetic.
Here are our tips and tricks for making transplanting as easy as possible!
Equipment
Before you can begin transplanting in your garden, you’ll need to make sure that you have the correct equipment to do so first, as not only will this make the process much easier, but it will also help to ensure that you don’t do any damage to your plants by using the incorrect equipment.
Arguably the most important piece of equipment you’ll need for successful plant transplantation is a shovel or trowel, which is what you’ll use to dig up the plant.
Shovels are generally used for medium to larger plants or groupings, while trowels are best used for singular or smaller plants.
Another important piece of equipment to keep handy are good quality pruning shears. These are used to help trim off roots or even foliage from the plant, and are an essential piece of equipment for any gardener.
Daylilies Out Of The Ground
One of the biggest worries that a lot of inexperienced gardeners have when transplanting different plants is how long their plants will be able to stay out of the ground before they absolutely have to be re-planted, with many people expecting it to be a matter of mere minutes before they need to be back in the ground.
For daylilies, this isn’t the case however, as they can actually remain out of the ground for a much longer period of time than you might expect, especially if the roots and tubes are kept enclosed in the soil they were initially in.
In fact, there have been some cases where daylilies have been dug up and forgotten about, and since their roots and tubers have been encased and protected in soil, they’ve begun to bloom, despite being out of the ground.
So, don’t worry too much about the amount of time your daylilies spend out of the ground during the transplanting process, as long as they’re encased in enough soil, they’ll be absolutely fine.
Transplant Shock
Some plants are known to be susceptible to what is known as “Transplant Shock”. This is a result of the process itself, and is essentially the plant reacting to the changes undergone by being moved.
Daylilies are hardy plants, which means that they’re usually fine with being dug up, lifted, and re-planted.
However, it’s still worth being careful with your daylilies, as you’ll want to avoid placing them under any additional pressure or stress.
To ensure you’re not doing this, try to transplant your daylilies on cooler, milder days, and provide them with plenty of water too, especially if you notice that their leaves have wilted slightly.
If you’ve recently transplanted daylilies and have noticed that some of the outer leaves of the plant have begun to yellow slightly then don’t panic, simply allow them to turn color and dry out, and you can then just remove them from the plant. It’s a common reaction!
Final Thoughts
We hope that this guide to transplanting daylilies in the garden will help you to successfully move your daylilies from one spot to another.
Despite how daunting it might all seem at first, the process is incredibly easy, and so long as it’s done at the correct time, you should have no issues transplanting your daylilies. Good luck!
Hi, I am Diane Peirce, and I am one of the co-creators of MichWildflowers.com.
I love sharing my experiences with individuals in this community, and I enjoy sharing some of the best tips I have learned over the years caring for my own garden at home.
In my articles, you will find the best flowers, most fragrant flowers you can plant in your garden, how to care for your favorite plants, informative guides and how-tos so you can have the best backyard in town!


")
")


![How To Save Zinnia Seeds [Harvesting And Storage]](https://michwildflowers.com/wp-content/uploads/2023/05/How-To-Save-Zinnia-Seeds-Harvesting-And-Storage-150x150.jpg "How To Save Zinnia Seeds [Harvesting And Storage]")
