There are nearly 400 different species to choose from and they come in a wide variety of colors and sizes, so no matter what type of flowering vine you need to fit your garden, there is sure to be a clematis plant for you.
However, clematis has a reputation for being finicky and difficult to care for. Some species of clematis can especially suffer during the winter months as they’re not always the most robust of plants.
This can lead many budding clematis gardeners unsure of whether clematis is the right plant for them.
Thankfully, clematis is easier to grow and care for than you might think. There are some simple steps you can take to protect your clematis from the harsh winter weather and numerous tips to help it throughout the year as well.
In this article, we will tell you all you need to know to care for your clematis.
What Is Clematis?
Clematis are a group of around 380 different species of woody vines. The majority are deciduous and shed their leaves annually, but there are some that are evergreen and even some that are herbaceous perennials.
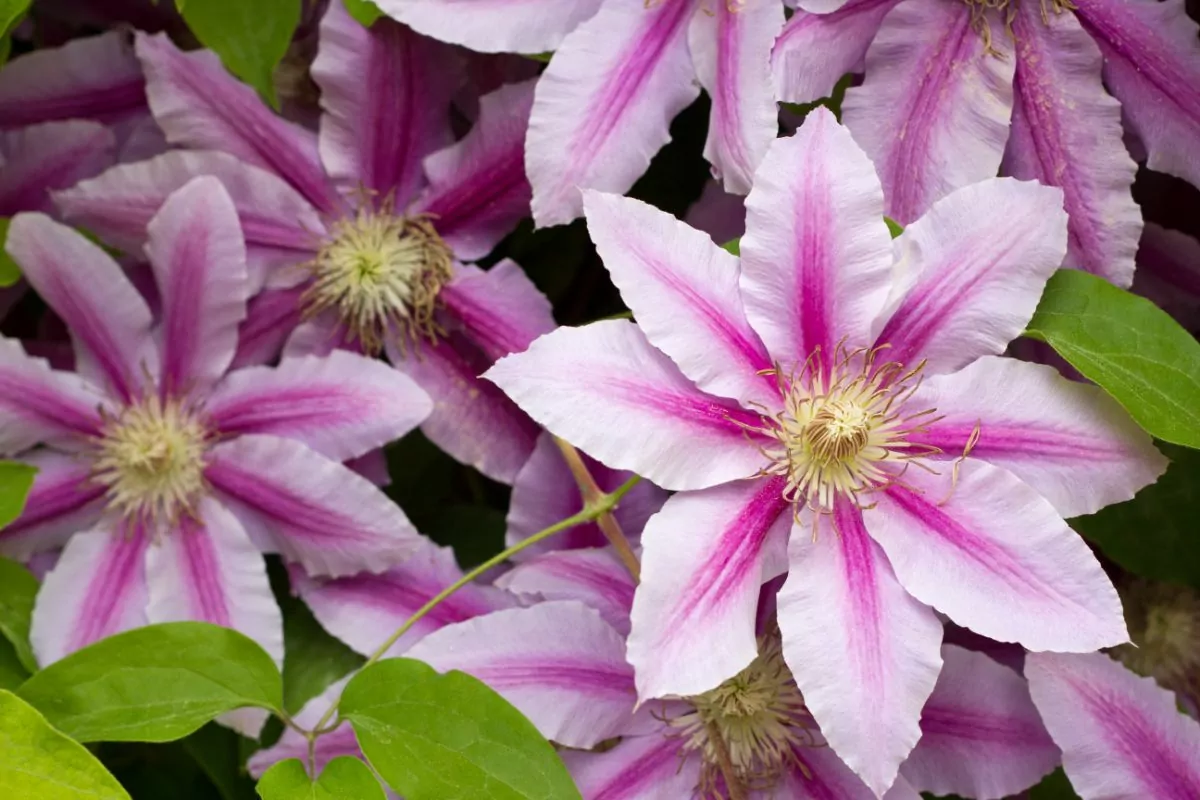
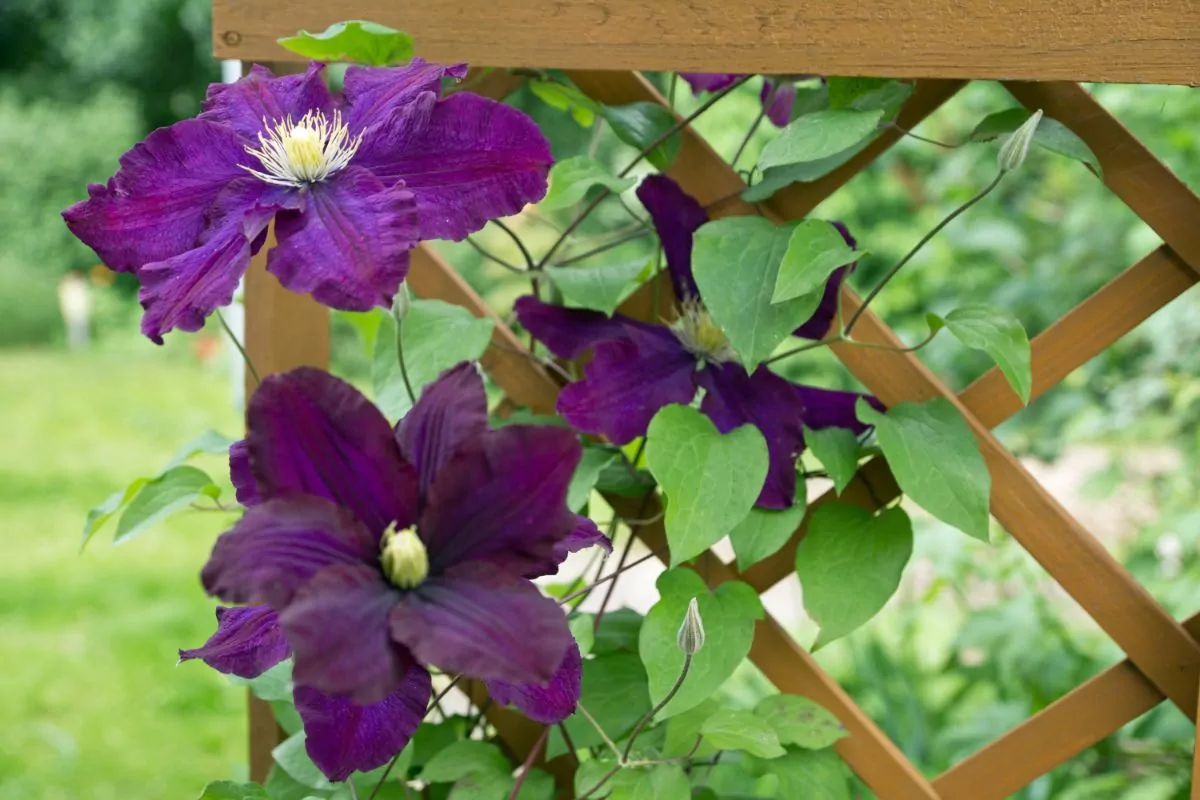
There are so many different types of clematis plants that it is very difficult to describe them. Some have small and delicate flowers whereas others can have flowers that are as large as dinner plates.
The plants themselves can differ greatly in size as well as some will cover an entire trellis whereas others are small enough for hanging baskets.
You can find them in almost all colors and some have very sweet fragrances. They can flower at different points throughout the year as well. As you can see, there is no single description that covers all the different species of clematis!
One thing that they do have in common, however, is that they can be a little picky about where they are planted. They have an unfair reputation for being tough to grow and take care of, but we think this reputation is unfair.
When you first plant a clematis plant, you have to ensure that you plant it in the right place and with the right care. Once your clematis has been established, however, you will have a beautiful plant that flowers every year without the need for much maintenance.
What Are the Three Clematis Groups?
The different species of clematis can be divided into three broad groups. These are:
Group 1
these are the clematis that bloom in late winter and early spring. They’re early flowering vines and include plants like C. armandii and C. montana
Group 2
any clematis that blooms every summer, such as Nelly Moser and C. x jackmanii
Group 3
clematis plants that bloom in summer and fall, such as Ville de Lyon and Princess Diana
How To Prepare Clematis For Winter
Not all clematis need to be prepared for winter. There are a wide variety of flowers in this broad species and some of them are evergreen, so they will survive throughout the winter without any issues at all. These preparatory steps are mainly for clematis plants that fall into Group 3.
Most clematis are deciduous plants, however. There are some species that despite being deciduous are still quite hardy to the cold, whereas others will benefit from a little extra care before heading into the long and cold winter.
If you need to prepare your clematis for winter, then here are some steps you should take.
1. Clean Up The Dead Leaves
As the seasons change from summer, to fall, and into winter, parts of your clematis will start to die. This is perfectly natural and there is no need to worry about finding some dead leaves and flowers on your plant.
Most of the petals will have naturally been blown away by the fall winds but the core of the flowers, their stamens, will still be in place.
At this time of year, it’s highly unlikely that your clematis will propagate from spreading any seeds and the stamens won’t flower again, so you can snip them away.
You may find that the petioles of your flowers (the stalk that attaches the blade of the leaf to the leaf base) have dried out already. Once dried, they won’t be able to grow anything so you can prune these without any problems as well.
Many of the leaves of your clematis may have fallen already as well. They may be on the ground and surrounding the main stem of your plant. In most cases, you can leave the leaves where they are.
They’ll turn into mulch and will help to add nutrients to your soil and plant as the months turn into spring.
However, if you’ve had problems with your clematis during the growing season, you don’t want to leave the leaves.
Clematis are prone to various diseases such as clematis wilt, leaf spot, and rust, and they can also attract pests. If your clematis has suffered from any of these, dispose of any leaves that have fallen, and make sure you prune any dead leaves as well.
If you do need to cut dead leaves from a damaged clematis, make sure you clean your shears. You should disinfect them with alcohol so that the clematis disease doesn’t spread to any of your other plants.
Make sure that you dispose of the dead leaves immediately and don’t add them to any mulch or garden waste, either. Throw them away with your household waste as soon as you can.
2. Remove The Dead Stems
Some species of clematis can be delicate plants. Removing the dead stems can help protect the plants by removing some weight from them.
Your clematis will have some dead stems as it heads in winter and these will be attached to healthy stems.
The dead stems won’t hurt the healthy stems, but if you live in a region that is likely to see heavy snowfall, you may want to remove the dead stems. These will accumulate snow during the winter and this can put additional weight onto the healthy stem.
Even healthy clematis stems can be fragile. They’re thread-like and aren’t the strongest stems so taking the weight from them is a good idea.
You should be careful, however, when you look at the stems. It can be difficult to tell whether the stems are actually dead or healthy sometimes.
If you’re not sure, there is a way to check the health of the stems. Take a hold of the stem in question between your index finger and your thumb and try to gently bend it. You don’t need to put much pressure and strength on the stem so remember to be gentle!
If the stem doesn’t budge at all, then the stem is still healthy and alive and should be left alone. On the other hand, if the stem does snap under your fingers, then you know it is dead and can be removed.
You can either cut the stem down to the first node that is still alive or cut it all of the way down.
3. Protect The Roots Of Your Clematis
The roots of clematis plants are even more fragile than the stems and vines. This is especially the case with plants that have only recently been planted and haven’t had the chance to fully establish themselves yet.
Bad weather conditions throughout the winter can affect the level of soil that covers the roots of your clematis. Heavy rain can make the soil level flatten and go down, leaving the roots in danger of becoming exposed to the cold.
This is why we recommend that you place a layer of fresh compost and mulch around the base of your clematis.
These extra layers will give the roots more protection and will also ensure that your plants have more nutrients when they move from dormancy to growth.
If you live in a region that suffers through particularly harsh winters and you are worried about how your clematis will fare through the cold, you can take your protection even further.
All you need is some burlap and you can use this to cover the crown of your clematis. Use some twine to secure it after you’ve wrapped it around the base of your plant.
Be careful not to fasten it too tightly, however! You should also make sure that you remove the burlap once the worst of the cold weather and hard frosts have passed.
4. Be Wary Of Wildlife
The winter months can be harsh for more than just plants. Many animals may struggle to find their usual food sources and if they’re feeling desperate, they may turn to more unusual foods instead.
This means that some wildlife might wander into your backyard, see your clematis, and decide to eat it to help sate their hunger.
If your backyard or garden is popular with wildlife, you may need to take some steps to protect your clematis from peckish animals. One of the easiest ways is to cover your clematis with burlap as we introduced earlier.
How Should New Clematis Be Planted?
One of the best ways to make sure that your clematis is ready for winter or for anything else the world may throw at it, is to plant it correctly.
If your clematis has secure roots and has firmly bedded in, it will survive more scenarios than a clematis that has been poorly planted or doesn’t have that firm base. Let’s look at how to best plant clematis.
When Should Clematis Be Planted?
Clematis can be planted throughout the year. It’s possible to plant a clematis in spring, summer, and fall, and different species have their own preferences.
However, if you do decide to plant your clematis in either spring or summer, we recommend that you pinch out the growing tips throughout the duration of the first growing season.
What Is The Best Area And Soil For Clematis?
It’s worth taking the time to prepare your soil and clematis before you plant it. This will give your clematis the best chance of bedding in and flowering as it should.
The best type of soil for clematis is loamy soil which is a little loose and has excellent drainage. The soil should be either neutral or mildly acidic, so aim for a soil pH of 6.0 to 7.5. Clematis also prefers full sun, so avoid any shaded locations.
The roots need some space, so make sure that they have a deep and moist space to spread out. They also prefer to remain cool, so this is another reason to ensure the soil is deep and loose.
How Do I Plant Clematis?
Before you begin to plant your clematis, you should soak the root ball. You can keep it in its nursery pot for this and simply place it in a bucket of water so the roots can absorb some moisture prior to planting. We recommend doing this for around 15 minutes.
While the root ball is soaking, you can prepare the hole. The hole needs to be pretty wide and deep, so aim for at least 18 inches wide and deep. We recommend aiming for at least 24 inches wide and deep if you can.
Remove the soil from your hole and mix in a couple of shovelfuls of organic material. This can be mature manure or aged compost and it will help the plant get the nutrients and moisture it needs.
You should also add in a couple of shovelfuls of material that are designed to help the plant retain moisture.
This can be peat moss, vermiculite, or coconut coir. This material will go a long way to helping the clematis roots stay as cool and moist as possible.
If your soil doesn’t have adequate drainage and you don’t have the option of using a different space, then you should also add a couple of shovelfuls of either pea gravel or landscape sand.
Clematis roots do not like soil that is too wet or has standing water so make sure you mix in material that will soak up water. You can also add some more sand or gravel to the mix as well.
Once you’ve mixed your soil with the shovelfuls of other material, fill the hole until it is around three-quarters full.
You should also add some bone meal as this will also help your clematis roots be as healthy as they can be. Water the soil thoroughly.
You can now look to put your supports in place. This can be a trellis or any other type of support. It’s best to plant these before you put your clematis in place as it will prevent the likelihood of anything becoming damaged.
If you’ve bought your clematis from a garden center, the vines will probably be attached to a small stake. This stake is then stapled to the pot. You should remove the staples so the stake isn’t attached to the pot anymore, but don’t remove the stake from the vines.
You can now remove the root ball from the pot and place it in the hole. The best way to do this depends on the type of plant.
Evergreen V arieties
plant these so that the crown is level to the soil surface
Deciduous Varieties
for this, the crown should be around four to six inches below the surface
Refill the rest of the hole with your remaining soil mix and firm the soil in place. With the roots secure, you can now attach the vines to your planted supports with either twice, garden velcro, or plant clips.
Water the clematis thoroughly. Make sure that you give the plant more water in hotter weather.
How Can You Propagate Clematis?
You can also propagate clematis! You can grow these plants from seeds but the germination process can take up to three years. Understandably, many people prefer to propagate clematis through cutting as this is a much faster process and is easy to do.
If you’re looking to propagate your clematis during the spring months, you should wait for any new growth to mature for a few weeks first.
New clematis growth can be very weak and waiting a few weeks will allow the new softwood to grow a little tougher. This will give it a better chance of surviving the propagation process.
Clematis cuttings should be taken from vines that have no flowers or flower buds if taken in spring. During the summer, you can take your cuttings from semi-ripe wood.
Avoid any parts of the plant that have tender growing tips as these will not survive the propagation process.
You should choose a healthy vine that is long and has several sets of leaves attached. This will allow you to make multiple cuttings.
Make sure that your shears or scissors are clean and sterilized and make your first cut around half an inch to an inch above the joint of a healthy leaf. This will be your bottom cut.
The top cut should be made around one inch above the next joint of heavy leaves. You can then progress along the vine and keep cutting it into sections until you finally reach the last set of leaves. The tip of the stem can be discarded.
Each of the sections that you’ve cut should have a chunk of the stem that is around three to four inches long. It will also have a set of healthy leaves at the top.
The bottom of each section should be dipped into rooting hormone powder. You don’t need too much of this, so make sure that you shake off any excess.
Once you have cut and dipped the stems, they can be planted. You will need pots that are four to six inches and they should be filled with a moist starter soil. You can plant up to four stems in each pot.
Place your pots somewhere with bright but indirect sunlight and make sure that you keep the soil moist.
If you have dry air, you need to be careful that the air doesn’t remove the moisture from your soil and cuttings. You can protect your clematis cuttings by covering your pots with a plastic bag.
The plastic should not touch your cuttings, however, so use chopsticks or something similar as a frame for the bag.
You can insert them into the soil and they will prevent the plastic bags from coming into contact with your cuttings. The bags can be secured with an elastic band.
It will take anything from four to eight weeks for the roots to form. After this time, the cuttings should be both fully rooted and producing lots of new growth.
You should prune the stems so that they are no more than 12 inches long as this will encourage more growth and branching.
You can plant them in late summer.
What Diseases Can Affect Clematis?
We mentioned earlier that clematis plants are prone to various diseases and this can affect how they are treated in winter. Let’s look at some of those diseases now.
Diseases On The Leaves
There are many diseases that are best spotted on the leaves of clematis plants. They can have different causes but all affect the leaves. These include:
Leaf Spot
this is one of the most common diseases. Over ten different types of leaf spot can affect clematis and they show as large spots on the leaves
Powdery Mildew
also known as Erysiphe aquilegiae, this shows as patches of gray-white material on the leaves
Tomato Ringspot Virus
this causes the leaves to turn yellow
Root Rot
In the winter section, we also mentioned how fragile the roots of the clematis plants are. They can easily become damaged by the cold, but they are also prone to root rot. If the roots start rotting, your plant will begin to wilt and will eventually die.
This can be caused by many factors such as the wrong or not enough nutrients in the soil.
Fungal Diseases
Like diseases found on the leaves, this is another very common occurrence with clematis plants.
The most common fungal diseases are Phoma dematidina or Coniothyrium dematidis-rectae, but there are others that attack clematis and cause it to wilt and wither.
Both of the fungal diseases we just named are very fast acting and can cause a healthy plant to look near death in only a day or two.
If your plant suffers from a fungal disease, it’s best to avoid any fungal disease fungicides. Although they may solve the issue with your plant, they can be toxic to many of the insects and pollinators that pass through your garden and can also be harmful to waterways.
Instead, the best option is to prune your clematis. Prune away the damaged part of the plant until you reach the healthy part of the vine. In some severe cases, you may need to cut the plant all the way down to the ground.
This may sound drastic, but it’s best to cut away the fungal disease and start again rather than to let it continue to fester. If you don’t cut out the entire infection, it will keep coming back and your plant will not become healthy again.
Final Thoughts
In this article, we took a deep dive into clematis. We introduced this species and then described all of the steps you need to take in order to prepare the plant for winter.
Many species of clematis don’t need any special winter preparations but if you have a group 3 clematis, it is best to take some action to protect it against the cold winter months.
We also gave some tips on how to plant your clematis properly. By planting your clematis right, you will make your clematis more winter-resistant.
We also explained some of the diseases that can affect clematis as these can also affect how you protect your clematis for winter.
We hope that the information in this article will help you look after your clematis!
Hi, I am Diane Peirce, and I am one of the co-creators of MichWildflowers.com.
I love sharing my experiences with individuals in this community, and I enjoy sharing some of the best tips I have learned over the years caring for my own garden at home.
In my articles, you will find the best flowers, most fragrant flowers you can plant in your garden, how to care for your favorite plants, informative guides and how-tos so you can have the best backyard in town!

")


